


Overview
If you are experimenting with monitoring fleets, high-altitude scientific experiments, or any kind of project requiring localization of devices, the MKR GPS Shield will offer you the functionality you need, and it is plug 'n' play!
The MKR GPS Shield is based on the u-blox SAM-M8Q GNSS (Global Navigation Satellite System) module. It is meant to be used on top of boards in the MKR format, but thanks to its Eslov connector, it is also possible to hook it up to any board having that kind of connector available using a cable.
This module is designed to operate with different positioning services concurrently. It receives and processes the signals from GPS, GLONASS, and Galileo. It interfaces with Arduino boards either through a serial interface, when used with headers and put on top of a MKR board, or through an I2C interface and a dedicated ESLOV cable supplied as bundle.
Configuration Commands and Backup
The GPS module can be configured via special commands. We have included an on-board battery holder for the system to keep the configurations made via software. This can be convenient when e.g. changing the operation mode of the GPS to 1g, something common in high altitude experiments, where specific settings away from the default ones are needed for the device.
Another example is the use of Galileo's localization option, which is disabled by default, but can be enabled by sending a configuration message (UBXCFG-GNSS) to the receiver. You can find a detailed description of all of the commands in the protocol here.
Getting Started
Our Arduino_MKRGPS library handles the two different interfaces and offer a consistent set of APIs designed for a full usage of the GPS acquired information
Need Help?
Check the Arduino Forum for questions about the Arduino Language, or how to make your own Projects with Arduino. Need any help with your board please get in touch with the official Arduino User Support as explained in our Contact Us page.
Warranty
You can find here your board warranty information.
Tech specs
| GNSS receiver | u-blox module SAM-M8Q (datasheet) |
| Connectors | MKR headers / Eslov |
| Input Voltage | 3.3V |
| Operating Voltage | 3.3V |
| Backup battery | CR1216 |
| Communication | Serial / I2C / DCC |
| Length | 45 mm |
| Width | 25 mm |
| Weight | 14 gr. |
Conformities
Resources for Safety and Products
Manufacturer Information
The production information includes the address and related details of the product manufacturer.
Arduino S.r.l.
Via Andrea Appiani, 25
Monza, MB, IT, 20900
https://www.arduino.cc/
Responsible Person in the EU
An EU-based economic operator who ensures the product's compliance with the required regulations.
Arduino S.r.l.
Via Andrea Appiani, 25
Monza, MB, IT, 20900
Phone: +39 0113157477
Email: support@arduino.cc
Documentation
OSH: Schematics
The Arduino MKR GPS Shield is open-source hardware! You can build your own board using the following files:
EAGLE FILES IN .ZIP SCHEMATICS IN .PDF
Additional I2C Port
The MKR GPS Shield has an additional connector meant as an extension of the I2C bus. It's a small form factor 5-pin connector with 1.0 mm pitch. The mechanical details of the connector can be found in the connector's datasheet.
The I2C port, also referred to as the Eslov self-identification port within Arduino, comes with: SDA, SCL, GND, +5V, and an extra digital pin meant to send an alarm to the otherwise plain I2C devices connected to it. The pinout is shown in the following image:
If you are interested in designing your own modules for Arduino boards with this expansion port, the connector we suggest using is code: SHR-05V-S-B, also in the picture.
Learn more
Get Inspired

A simple BlueTooth (BLE) remote controller for the Arduino Alvik robot, implemented in MicroPyhton
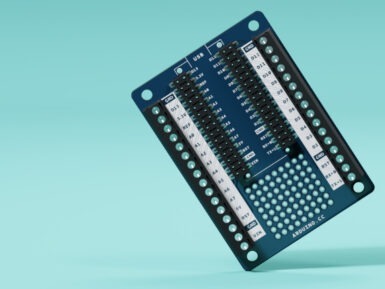
The brand new Nano Screw Terminal Adapter turns up the speed on your prototyping efforts by giving you a fast, reliable way to hook up your boards. This awesome add-on is exactly what seasoned makers have been crying out for, and is now available from the Arduino Store. Let’s take a look at this mini mechanical marvel. A solderless solution With a finished project, you’re likely to make permanent connections to your Nano by soldering it. Even if you’re connecting it using a header strip, the wires, components, sensors and accessories will be soldered, crimped or attached in a permanent way to the controller side of your project. It makes perfect sense to do this, when you’re looking for a reliable connection. The trouble with permanent connections like this is that they’re… well, permanent! Soldering and de-soldering during the design and prototyping stage can become a real chore. And it’s not good for the components or the board itself, either. The Screw Terminal Adapter is what you need. It’s something we’ve been asked for a lot, giving people a way to make robust, fast, easy connections that can be changed just as easily. Easy access to all I/Os The Nano Screw Terminal Adapter features a double row of headers. The Nano drops into the two inner rows, giving you a second, outer set that lets you connecting using jumpers, wires or what have you. Then you have a third row of connectors on either side of the adapter with a screw terminal for each pin. The perfect way to connect wires or components in a reliable, but easily changeable way. It’s never been easier to develop and design a project that with these connection options. There’s even a 9x8 prototyping area with through plated holes for adding extra components, connections or accessories. Of course, this doesn’t have to only be for prototyping. The screw terminal is a long-established, trusted connection option, so there’s no reason it can’t become a


