


Overview
With this carrier in combination with any board from the MKR family, you can quickly create your next IoT project without any extra components. This carrier has all you need in sensors and actuators to create cool projects connected to the Internet.
Using the MKR IoT Carrier Rev2 in combination with any board of the MKR family, you can quickly build:
- Environment monitoring stations: Using the sensors on the carrier, you can map different phenomena around you. You can easily measure temperature, humidity, barometric pressure and air quality or detect the movement of the board, and in case you want to expand the sensor you can use any of the grove connectors to connect analog or I2C grove compatible modules. All this information can be stored in the SD card or sent directly to the Arduino IoT Cloud.
- GUI IoT interface: Even if you want to visualize sensor data or design your own user interface, you can use the OLED color display to create your own navigation menus or use the LEDs and the buzzer for feedback.
- Control external devices: Control electronic appliances up to 24 Volts using the two on-board relays. Either you want to turn on or off your reading lamp remotely through the Arduino IoT Cloud Remote app or use any of the sensor data to affect the behavior of the lamp.
Tech specs
| Humidity, temperature barometric and VOC sensor | BME688 |
| IMU | LSM6DSOX |
| Ambient light, proximity, color and gesture sensor | APDS-9960 |
| Capacitive buttons | 5 (Qtouch Pad) |
| Actuators | Buzzer, 5 RGB LEDs |
| 24V Relays | 2 (V23079) |
| Display | KD013QVFMD002-01 |
| Grove connectors | 2 connected to analog pins (A0/A6), 1 connected to I2C |
| Micro SD card slot | Micro SD card not included |
| Battery holder | 18650 Li-Ion rechargeable battery (battery not included) |
Resources for Safety and Products
Manufacturer Information
The production information includes the address and related details of the product manufacturer.
Arduino S.r.l.
Via Andrea Appiani, 25
Monza, MB, IT, 20900
https://www.arduino.cc/
Responsible Person in the EU
An EU-based economic operator who ensures the product's compliance with the required regulations.
Arduino S.r.l.
Via Andrea Appiani, 25
Monza, MB, IT, 20900
Phone: +39 0113157477
Email: support@arduino.cc
Documentation
Learn more
Get Inspired
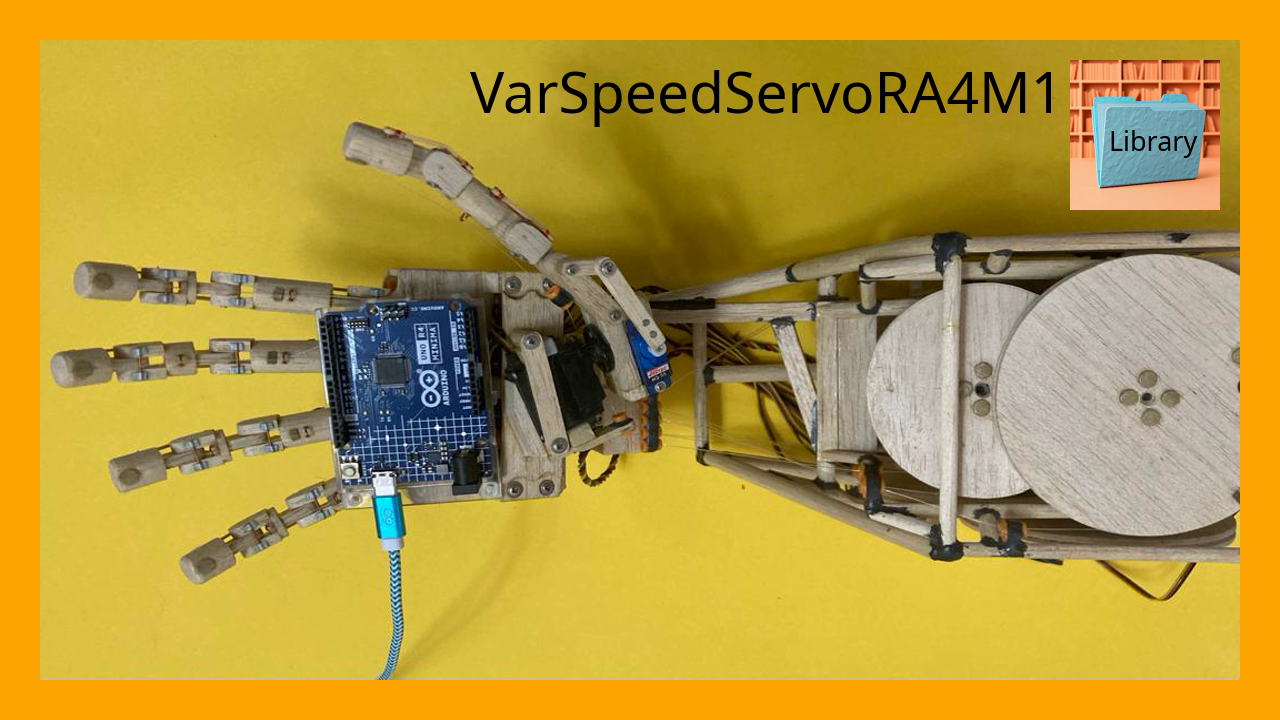
VarSpeedServoRA4M1 is a library for Arduino that enables precise control over servo motors, including speed, position, and movement sequences.

In robotics and several other disciplines, PID (proportional-integral-derivative) control is a way for systems with closed-loop feedback to adjust themselves according to sensor data without overshooting the target. Drones, for example, use PID control to remain stable without wild oscillations caused by over-correction. But implementing PID control can feel overwhelming, so Adam Soileau from element14 Presents built a simple robot for some experimentation. This robot’s only job is to drive forward until it sees a wall, then stop at a specific distance from that wall. That isn’t hard to achieve when a robot is moving at slow pace, because the code can tell the robot to stop moving the moment it reaches the target distance. But when moving fast, the robot has to take braking acceleration into account and that is much harder to predict. PID control is perfect for this situation, because it adjusts motor output in real-time according to the incoming sensor data. In this case, that sensor data comes from an ultrasonic rangefinder mounted to the front of the 3D-printed robot. An Arduino UNO R4 Minima board receives that data and controls the robot’s two motors through H-bridge drivers. That hardware is very straightforward so that Soileau could focus on the PID control. Tuning that is all about balancing the three constant values to get the desired performance. Soileau spent some time working on the Arduino sketch to get the PID control integrated and was eventually able to make the robot act like it should. If you’re interested in using PID control in your next robotics project, then Soileau's video should help you get started.
FAQs
What are the main differences between MKR IoT Carrier and MKR IoT Carrier Rev2?
Some sensors have changed between both versions:
- The humidity sensor (HTS221) and barometric pressure sensor (LP22HB) was replaced with the BME6688 sensor.
- The IMU (LSM6DS3) was replaced with LSM6DSOX.
Some other components have been repositioned:
- Addition of a reset button
- 90° rotation of the relay connectors
- Repositioning of the light sensor (APDS-9960)
- Change of pins assigned to control the relays to pin 1 and 2
- Change grove connector assignment from pin A5 to A6
Do I have to change my sketch if I have been using the first revision of the MKR IoT Carrier?
The MKR IoT Carrier library is compatible with both revisions of the carrier, just make sure to use the latest version of the library.


