


HM0360 VGA Monochrome DVP Camera Module for Arduino GIGA R1 WiFi Board
Low light sensitive, ultralow power consumption, simple interface, compatibility with Arduino libraries, suitable for battery-powered and energy-efficient applications.
Overview
The camera module is based on HM0360 VGA image sensor, which is an ultralow power, Back Side Illuminated (BSI) CMOS sensor designed for energy efficient smart vision applications, such as object-specific classification, tracking, and identification. The VGA resolution is ideal for monitoring, detection and image capture for wide field of view camera devices.
The low consumption camera module is equipped with a 64°(DFOV) stock Lens. It supports 8-bit RAW output format. The standrad operating temperature is between -30~85℃, with the stable Image temp. between 0~50℃.
It is fully compatible with Arduino GIGA R1 WiFi board, a professional-grade microcontroller development board recently launched by Arduino. Seamlessly integrates with our camera module, unlocking versatile image capture and processing capabilities. Harness the power of Arduino GIGA R1 WiFi and gain a competitive edge in your projects.
Features:
- Cost-Effective: Affordable solution for implementing visual capabilities in cost-sensitive projects.
- Compact Size: Compact form factor enables integration into space-constrained applications.
- Simplify Embedded Vision for All: Easy to set up and operate. Making it possible to add machine vision to your GIGA R1 WiFi board without much effort at all.
- High Precision: With on chip high precision oscillator, Bad Pixel correction(BPC), auto exposure/gain, amblent light sensor and zone detection
- Low Power Consumption: Efficient power usage, making it suitable for battery-powered and energy-efficient applications.
Tech specs
| Image Sensor | HM0360 |
| Resolution | VGA |
| Optical Size | 1/6'' |
| Number of effective pixels | 640(H) × 480(V) |
| Pixel Size | 3.6μm × 3.6μm |
| Support Platform | Arduino GIGA R1 WiFi Board |
| Shutter Type | Electronic Rolling Shutter |
| Color Filter Array | Monochrome |
| Frame Rate | 640x480@15fps, 320x240/160x120@30fps |
| Output Format | RAW8/RAW4 |
| F.NO | 2.8±5% |
| Focus Type | Fixed Focus |
| Focal Length | 2.59mm |
| Field of View(FOV) | 64°(D) |
| Power Supply | AVDD: 2.8V; DOVDD: 1.8V; DVDD: 1.2V |
| Operating Temperature | -30~85℃ |
| Camera Board Size | 30.5mm x 30.5mm |
Documentation
Get Inspired
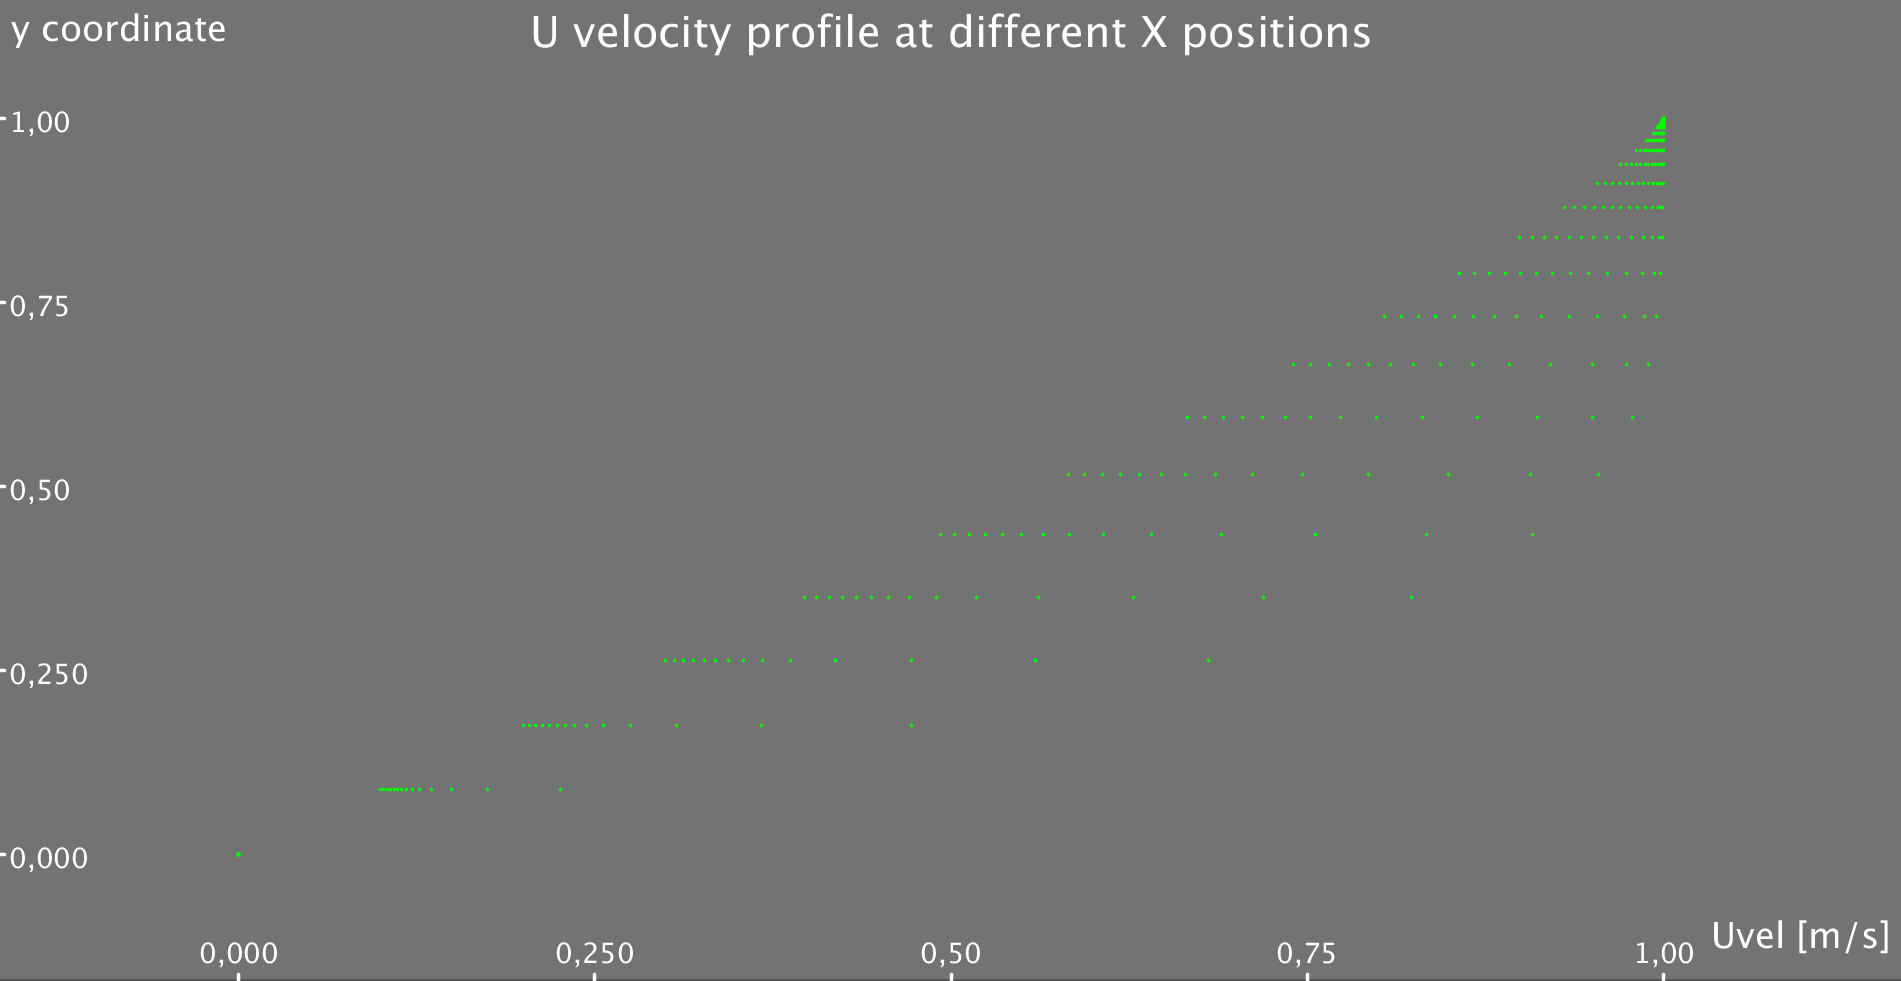
Simple Code that allows you to solve the 2D flow equation for a flat plate Boundary Layer!!
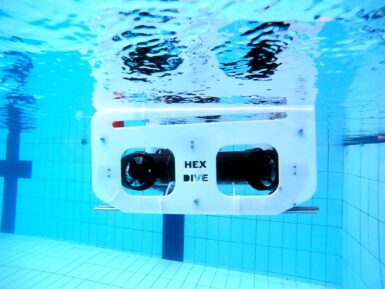
Who doesn’t want to explore underwater? To take a journey beneath the surface of a lake or even the ocean? But a remotely operated vehicle (ROV), which is the kind of robot you’d use for such an adventure, isn’t exactly the kind of thing you’ll find on the shelf at your local Walmart. You can, however, follow this guide from Ranuga Amarasinghe to build your own ROV for some aquatic fun. Amarasinghe is a 16-year-old Sri Lankan student and this is actually the second iteration of his ROV design. As such, he's dubbed it “ROV2” and it appears to be quite capable. All of its electronics sit safely within a 450mm length of sealed PVC tube. That mounts onto the aluminum extrusion frame structure that also hosts the six thrusters powered by drone-style brushless DC motors. ROV2’s brain is an Arduino Mega 2560 board and it drives the BLDC motors through six electronic speed controllers (ESCs). It receives control commands from the surface via an umbilical. The operator holds a Flysky transmitter that sends radio signals to a receiver floating on the water. An Arduino UNO Rev3 reads those and then communicates the motor commands to the Mega through the tethered serial connection. That limits the maximum length of the tether to about 40 meters, which subsequently limits the maximum operating depth. With the specified lithium battery pack, ROV2 can traverse the depths for 30-45 minutes. And when equipped with the 720p FPV camera, pilots can see and record all of the underwater action.


