


Arduino IoT Bundle
The Arduino IoT Bundle is the best way to start exploring the world of connected devices using the Arduino Nano RP2040 Connect. Follow the 5 step by step tutorials to quickly learn how to build IoT devices.
Overview
Follow the 5 step by step tutorials we have prepared for you and combining the electronic components included in the bundle, you’ll quickly learn how to build devices that connect to the Arduino IoT Cloud.
The 5 step by step tutorials are:
Arduino IoT Cloud Compatible

Tech specs
Each bundle includes:
- 1 Arduino Nano RP2040 Connect
- 1 micro USB cable
- 1 400-point breadboard
- 70 solid-core jumper wires
- 2 stranded jumper wire
- 6 phototransistors
- 3 potentiometers (10k ohm)
- 10 pushbuttons
- 1 temperature sensor (TMP36)
- 1 tilt sensor
- 1 alphanumeric LCD (16 x 2 characters)
- 1 bright white
- 28 LEDs (1 RGB, 8 red, 8 green, 8 yellow, 3 blue)
- 1 small DC motor (6/9V)
- 1 small servo motor
- 1 piezo capsule (PKM17EPP-4001-B0)
- 1 H-bridge motor driver (L293D)
- 1 optocouplers (4N35)
- 2 MOSFET transistors (IRF520)
- 5 capacitors (100uF)
- 5 diodes (1N4007)
- 1 male pin strip (40 x 1)
- 20 resistors (220 ohm)
- 5 resistors (560 ohm)
- 5 resistors (1k ohm)
- 5 resistors (4.7k ohm)
- 20 resistors (10k ohm)
- 5 resistors (1M ohm)
- 5 resistors (10M ohm)
Resources for Safety and Products
Manufacturer Information
The production information includes the address and related details of the product manufacturer.
Arduino S.r.l.
Via Andrea Appiani, 25
Monza, MB, IT, 20900
https://www.arduino.cc/
Responsible Person in the EU
An EU-based economic operator who ensures the product's compliance with the required regulations.
Arduino S.r.l.
Via Andrea Appiani, 25
Monza, MB, IT, 20900
Phone: +39 0113157477
Email: support@arduino.cc
Get Inspired
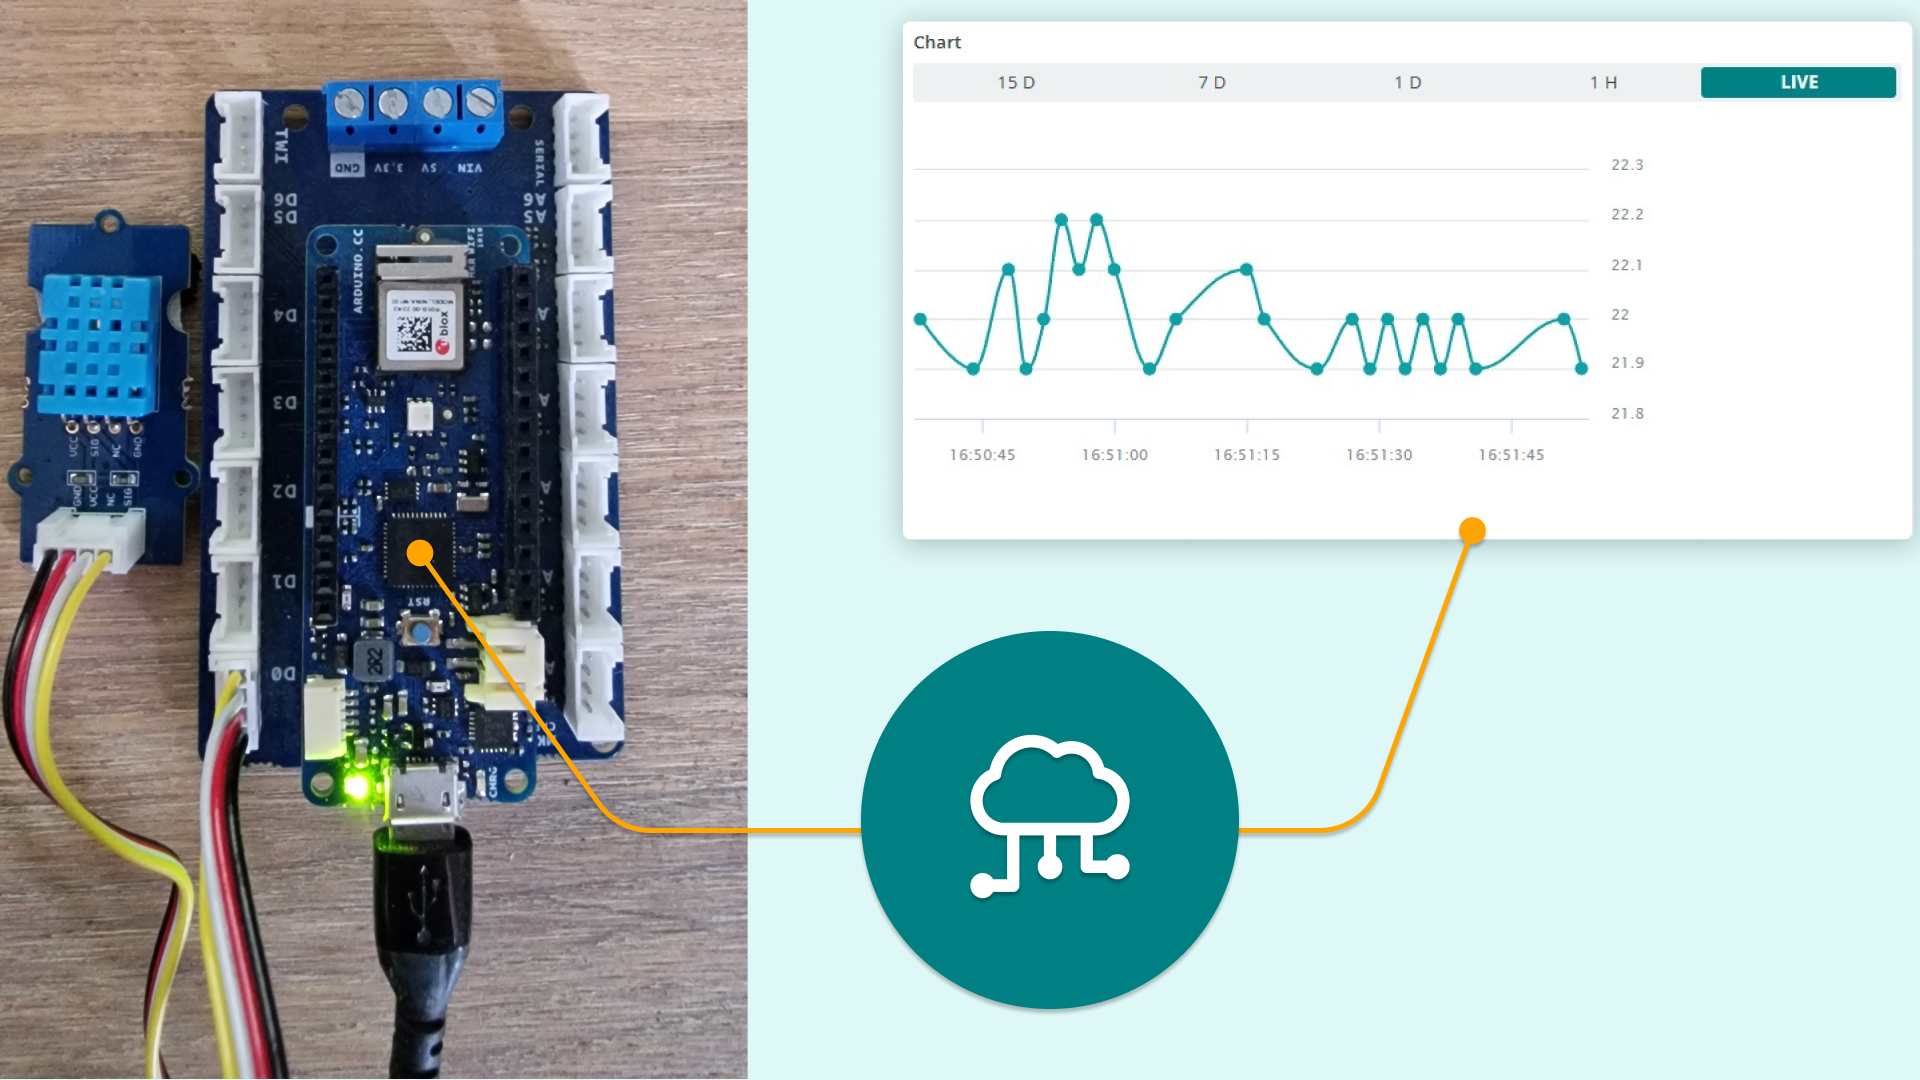
Easy data logging with grove sensors using the MKR Connector Carrier and MKR boards
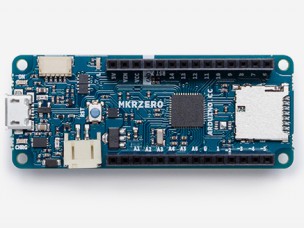
Say hello to the newest member of the Arduino family! The MKRZero--now available on our stores at the price of $21.90/€20.90 (+ tax)--shrinks the functionality of the Arduino Zero down into an Arduino MKR1000 form factor, making it a great educational tool for learning about 32-bit application development. Like the Zero, the latest board is based on a Microchip SAM D21 ARM Cortex®-M0+ MCU. An integrated SD connector with dedicated SPI interfaces (SPI1) allows you to play with files without any extra hardware, while an analog converter enables you to monitor its battery voltage. The MKRZero’s features in a nutshell: small form factor number crunching capability low power consumption integrated battery management USB host integrated SD management programmable SPI, I2C and UART Interested? You can explore the MKRZero in more detail, including its technical documentation, via the links below: Product Page Getting Started Guide Tutorials on Project Hub Make a ScheduledDataLogging Create a I2S synth generator (theremin) Read battery voltage Make it rain On the software side: If you use the Arduino IDE, you will need to add the new Intel SAMD Core, selecting Tools menu, then Boards, and last Boards Manager on the Arduino Software (IDE). If you use Arduino Web Editor, everything is already updated! Watch out music makers, we’ve got some news for you! We have released two libraries for your enjoyment: Arduino Sound library - a simple way to play and analyze audio data using Arduino on SAM D21-based boards. I2S library - to use the I2S protocol on SAMD21-based boards. For those who don’t know, I2S (Inter-IC Sound) is an electrical serial bus interface standard for connecting digital audio devices. Buy a brand new Arduino MKRZero now! Join the discussion on the Arduino Forum!
FAQs
I plugged the board to my PC / MAC but I cannot see the serial port listed in the IDE, so I can't upload my sketch to the board!
- Make sure the foam that protects the boards’ pins is removed.
- Try connecting the board with another USB cable.
- Try connecting the board to another USB port. If possible, avoid USB-hubs.
You can see more information and other things to try in this Help Center article.
Do I need to subscribe to the Arduino IoT Cloud to build the projects described in the tutorials?
No, all the projects can be built using the free plan of the Arduino IoT Cloud. Click here to see what is included in the plan.
How to enable the 5V / VUSB pin?
The 5V pin is disabled by default. You can locate on the bottom of the board on the VBUS pin two pads, shorting these will enable 5V output. More info on this here.
Where can I find the step by step tutorials?
You can find the step by step tutorials at arduino.cc/iot-bundle


