


Arduino Education Starter Kit
Learn electronics and get started with programming in your classroom
step-by-step. No experience necessary.
Our online platform and content, that you can access by using this kit, are available in MULTIPLE languages.
Overview
Teach middle school students the basics of programming, coding, and electronics. No prior knowledge or experience is necessary as the kits guide you through step-by-step, you are well-supported with teacher guides, and lessons can be paced according to your students’ abilities. You can integrate the kit throughout the curriculum, giving your students the opportunity to become confident in programming and electronics with guided sessions and open experimentation. You’ll also be teaching them vital 21st-century skills such as collaboration and problem-solving.
The Arduino Education Starter Kit contains all the hardware and software you need for eight students (in groups of 2). You get step-by-step-lessons, teacher notes, exercises, and for a complete and in-depth class experience there’s also extra optional resources including activities, concepts, history, and interesting facts.
The online platform contains the teacher content, nine 90-minute lessons, and two open-ended group projects that teach students coding and electronics. Each lesson builds off the previous one, giving students a further opportunity to apply the skills and concepts they have already learned. Students also get an engineering logbook that they complete as they work through the lessons.
The beginning of each lesson provides an overview, estimated completion times, and learning objectives. Throughout each lesson, there are teacher notes and information that help the lesson go smoothly. Extension ideas are provided at the end of each lesson.
Conformities
Resources for Safety and Products
Manufacturer Information
The production information includes the address and related details of the product manufacturer.
Arduino S.r.l.
Via Andrea Appiani, 25
Monza, MB, IT, 20900
https://www.arduino.cc/
Responsible Person in the EU
An EU-based economic operator who ensures the product's compliance with the required regulations.
Arduino S.r.l.
Via Andrea Appiani, 25
Monza, MB, IT, 20900
Phone: +39 0113157477
Email: support@arduino.cc
Get Inspired
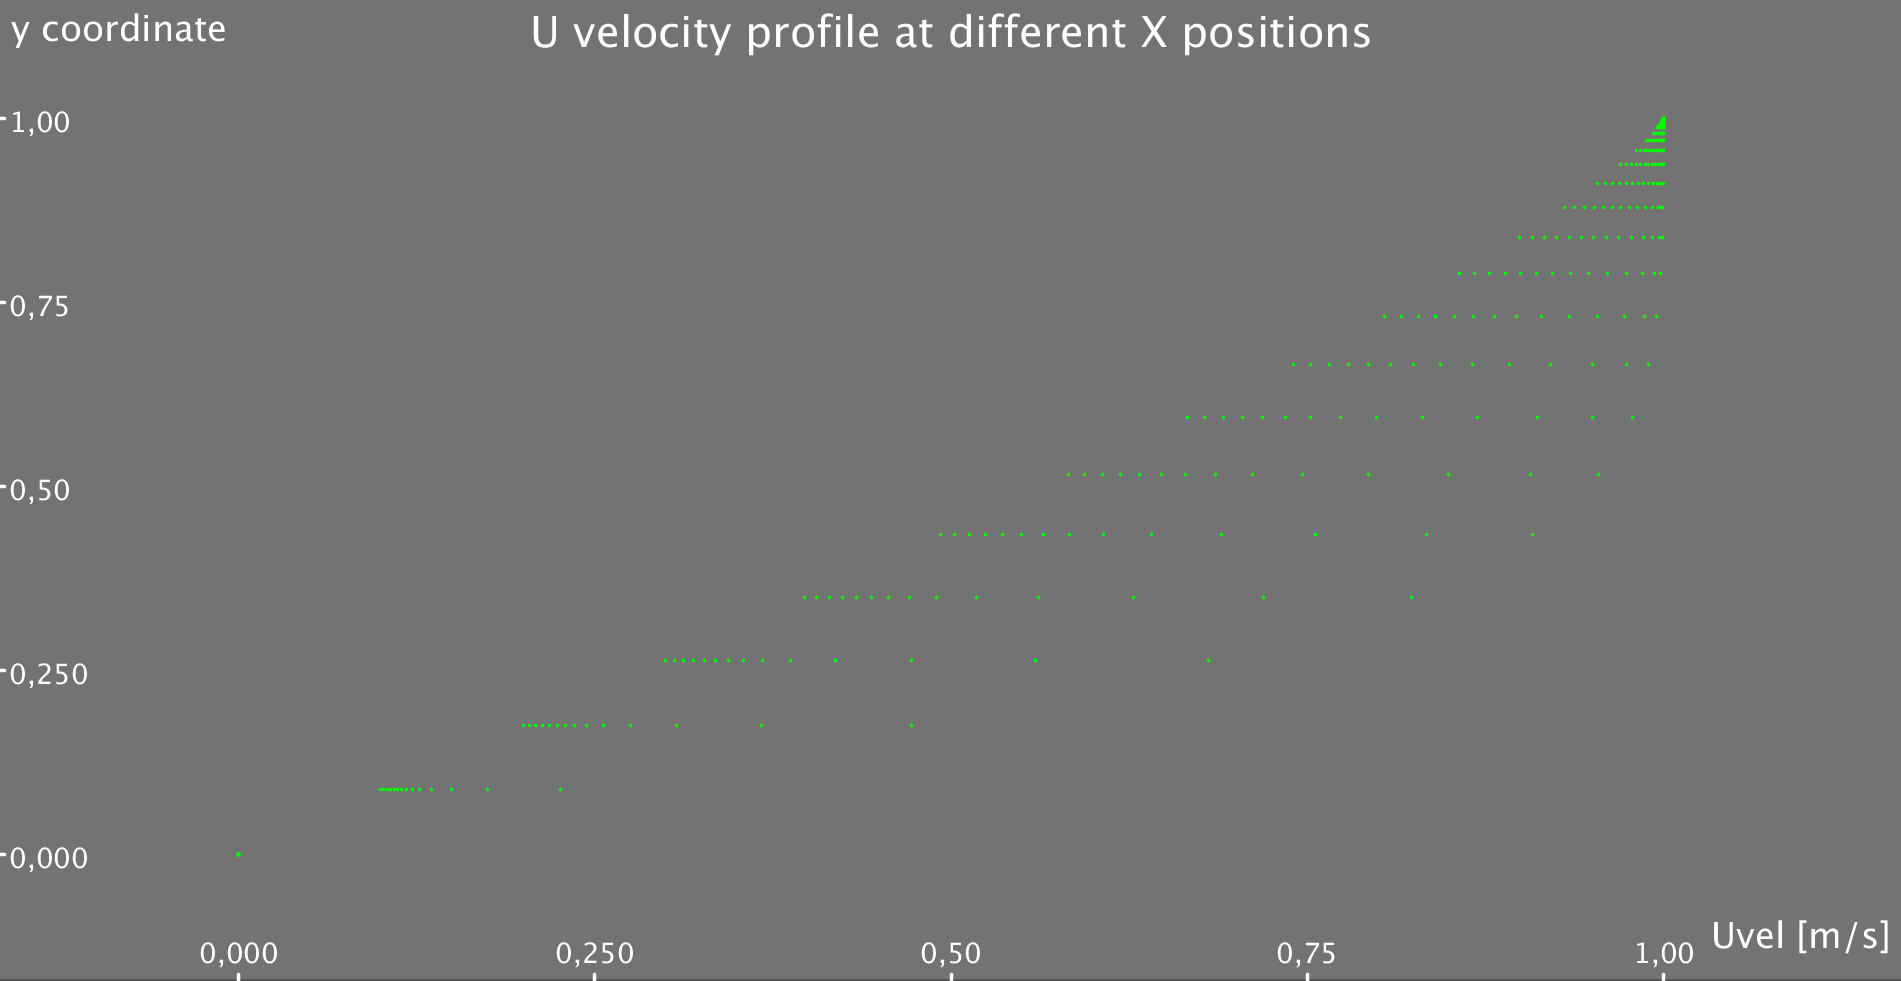
Simple Code that allows you to solve the 2D flow equation for a flat plate Boundary Layer!!
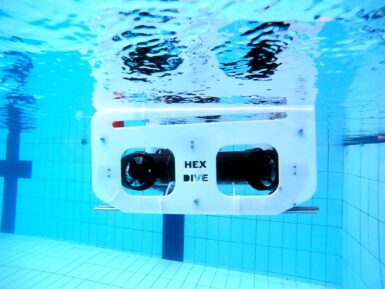
Who doesn’t want to explore underwater? To take a journey beneath the surface of a lake or even the ocean? But a remotely operated vehicle (ROV), which is the kind of robot you’d use for such an adventure, isn’t exactly the kind of thing you’ll find on the shelf at your local Walmart. You can, however, follow this guide from Ranuga Amarasinghe to build your own ROV for some aquatic fun. Amarasinghe is a 16-year-old Sri Lankan student and this is actually the second iteration of his ROV design. As such, he's dubbed it “ROV2” and it appears to be quite capable. All of its electronics sit safely within a 450mm length of sealed PVC tube. That mounts onto the aluminum extrusion frame structure that also hosts the six thrusters powered by drone-style brushless DC motors. ROV2’s brain is an Arduino Mega 2560 board and it drives the BLDC motors through six electronic speed controllers (ESCs). It receives control commands from the surface via an umbilical. The operator holds a Flysky transmitter that sends radio signals to a receiver floating on the water. An Arduino UNO Rev3 reads those and then communicates the motor commands to the Mega through the tethered serial connection. That limits the maximum length of the tether to about 40 meters, which subsequently limits the maximum operating depth. With the specified lithium battery pack, ROV2 can traverse the depths for 30-45 minutes. And when equipped with the 720p FPV camera, pilots can see and record all of the underwater action.


