


Overview
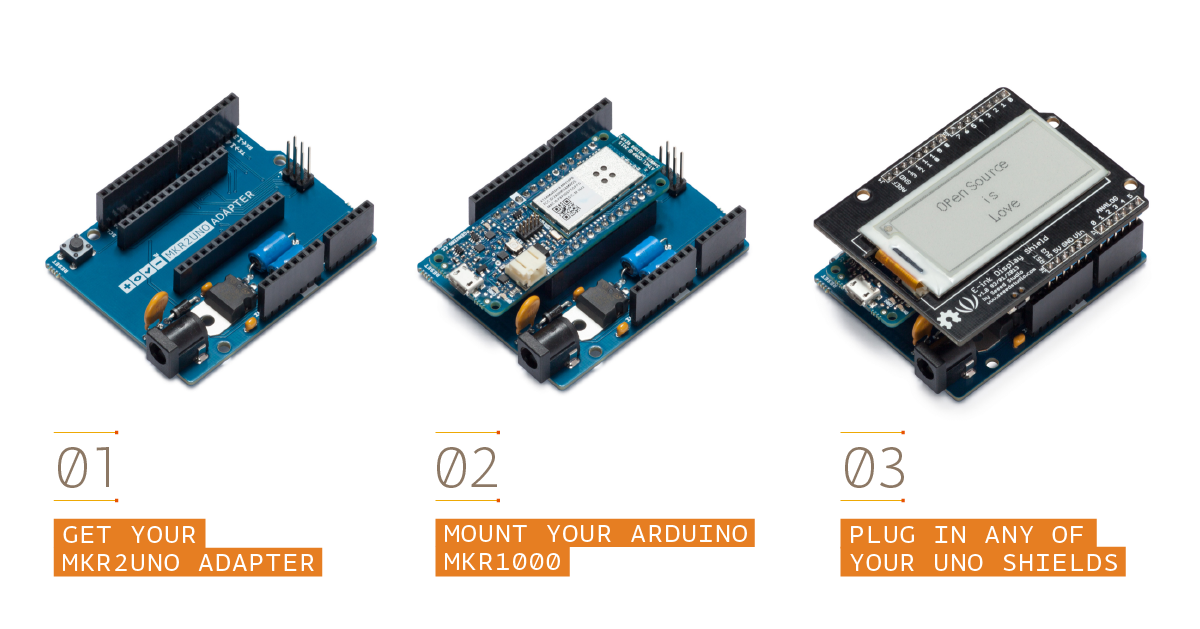
The MKR2UNO Adapter allows you to turn your Arduino UNO form factor based project into a MKR based one without too much effort! You can so upgrade your project with a powerful board with integrated LiPo battery charger.
Please note that currently the MKR2UNO adapter is compatible only with MKR1000 without headers
Need Help?
- On the Software on the Arduino Forum
- On Projects on the Arduino Forum
- On the Product itself through our Customer Support
Tech specs
| Operating Voltage | 3.3V |
| Input Voltage (recommended) | 7-12V |
| Input Voltage (limit) | 6-16V |
| Analog Input Pins | 6 |
| Analog Output Pins | 1 |
| Digital I/O Pins | 14 |
| DC Current for 3.3V Pin | 700 mA |
| DC Current for 5V Pin | 700 mA |
| Length | 68.6 mm |
| Width | 53.4 mm |
| Weight | 24 g |
Conformities
Resources for Safety and Products
Manufacturer Information
The production information includes the address and related details of the product manufacturer.
Arduino S.r.l.
Via Andrea Appiani, 25
Monza, MB, IT, 20900
https://www.arduino.cc/
Responsible Person in the EU
An EU-based economic operator who ensures the product's compliance with the required regulations.
Arduino S.r.l.
Via Andrea Appiani, 25
Monza, MB, IT, 20900
Phone: +39 0113157477
Email: support@arduino.cc
Documentation
OSH: Schematics
MKR2UNO is open-source hardware! You can build your own board using the following files:
EAGLE FILES IN .ZIP SCHEMATICS IN .PDF
Please keep in mind that the MKR2UNO is just a form factor adapter and so is NOT present any voltage translation. Be careful before connecting a shield since shield without IOREF level shifting capability may not work properly.
Like in many others Arduino boards this adapter allows to power your MKR board using a barrel jack with center positive polarity or the VIN pin on the headers.
Unlike the Arduino UNO, the MKR2UNO Adapter do NOT have I2C signals on A4 and A5 and SPI on pins 11, 12 and 13.
All the pins on the MKR2UNO Adapter are wired one to one from the MKR to the UNO form factor with some exception:
Get Inspired

Begins a process of combining Portenta H7 with Vision Shield – LoRa by acquiring, sending, and displaying a camera image via USB/Serial connection.

Jeremy Ellis is a teacher, and as such, wanted a longer-term project that his students could do to learn more about microcontrollers and computer vision/machine learning, and what better way is there than a self-driving car. His idea was to take an off-the-shelf RC car which uses DC motors, add an Arduino Portenta H7 as the MCU, and train a model to recognize target objects that it should follow. After selecting the “RC Pro Shredder” as the platform, Ellis implemented a VNH5019 Motor Driver Carrier, a servo motor to steer, and a Portenta H7 + Vision Shield along with a 1.5” OLED module. After 3D printing a small custom frame to hold the components in the correct orientation, nearly 300 images were collected of double-ringed markers on the floor. These samples were then uploaded to Edge Impulse and labeled with bounding boxes before a FOMO-based object detection model was trained. Rather than creating a sketch from scratch, the Portenta community had already developed one that grabs new images, performs inferencing, and then steers the car’s servo accordingly while optionally displaying the processed image on the OLED screen. With some minor testing and adjustments, Ellis and his class had built a total of four autonomous cars that could drive all on their own by following a series of markers on the ground. For more details on the project, check out Ellis' Edge Impulse tutorial here.


