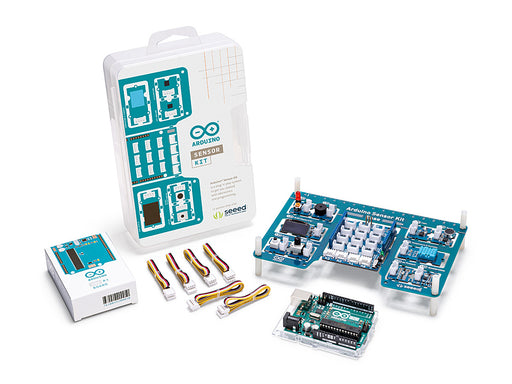
Arduino Sensor Kit - Base
Learn to Plug, Sketch and Play with basic Grove sensors, actuators and Arduino.
All the modules are pre-wired on the PCB, just connect your Arduino Board to the Shield and start your measurements!
Overview
The Arduino Sensor Kit is made for Makers who have just started using Arduino to explore the vast space of electronics and programming. This kit teaches how to connect and program basic Grove modules that includes both sensors and actuators.
Grove is an open-source, modulated, and ready-to-use toolset and takes a building block approach to assemble electronics. This Kit includes a Base Shield to which the various Grove modules can be connected both individually, or together in various combinations to create fun and exciting projects. All of the modules use a Grove connector, which connects each of the components to a Base Shield in just a few seconds. The Base Shield can then be mounted on to an Arduino UNO board and can be programmed using the Arduino IDE. Instructions for connecting and programming the different modules are also included in this kit.
This kit was elaborated in collaboration with Seeed Studio and provides the Arduino community with the opportunity to build projects with minimal effort of both wiring and coding. This kit acts as a bridge to the world of Grove and provides a flexible way for Makers to extend their projects to include other complex Grove modules.
The Kit comes includes access to an online platform with all the instructions required to plug, sketch and play with the different Grove Modules.
This kit does not include the Arduino Uno board and if you would like to purchase this kit along with the Uno, check out the Sensor Kit Bundle. It features the Arduino Sensor Kit + the Arduino Uno Rev 3 at a special price.
Tech specs
The kit includes:
HARDWARE
1 Base Shield that is designed to fit on top of an Arduino UNO board. It comes equipped with 16 grove connectors, which, when placed on top of the UNO, provides functionality to various pins. It includes:
-
7x digital connections
-
4x analog connections
-
4x I2C connections
-
1x UART connection
10 Grove modules included can be connected to the base shield, either through the digital, analog or I2C connectors on the shield. Let's take a quick look at them:
-
The LED - simple LED that can be turned ON or OFF, or dimmed.
-
The button - pushbutton that can either be in a HIGH or LOW state.
-
The potentiometer - a variable resistor that increases or decreases resistance when turning its knob.
-
The buzzer - a piezo speaker that is used to produced binary sounds.
-
The light sensor - a photoresistor that reads light intensity.
-
The sound sensor - a tiny microphone that measures sound vibrations.
-
The air pressure sensor - reads air pressure, using I2C protocol.
-
The temperature sensor - reads temperature and humidity at the same time.
-
The accelerometer - a sensor used for orientation, used for detecting movement.
-
The OLED screen - a screen that values or messages can be printed to.
6 Grove cables allows you to easily connect the modules to the Base Shield without any soldering required.
SOFTWARE
The Arduino Sensor Kit Library is a wrapper for that contains links to other libraries related to certain modules such as the accelerometer, air pressure sensor, temperature sensor and the OLED display. This library provides easy-to-use apis that will help you build a clear mental model of the concepts you will be using.
LEARNING MATERIALS
Access to an online platform with all the instructions required to plug, sketch and play with the different Grove Modules. There are 10 lessons and they are :
-
01 The LED
-
02 The Button
-
03 The Potentiometer
-
04 The Buzzer
-
05 The Light Sensor
-
06 The Sound Sensor
-
07 The Air Pressure Sensor
-
08 The Temperature Sensor
-
09 The Movement Sensor
-
10 The OLED Screen
Check the Arduino Sensor Kit - Bundle! It features the Arduino Sensor Kit + the Arduino Uno Rev 3 at a special price.
Get Inspired
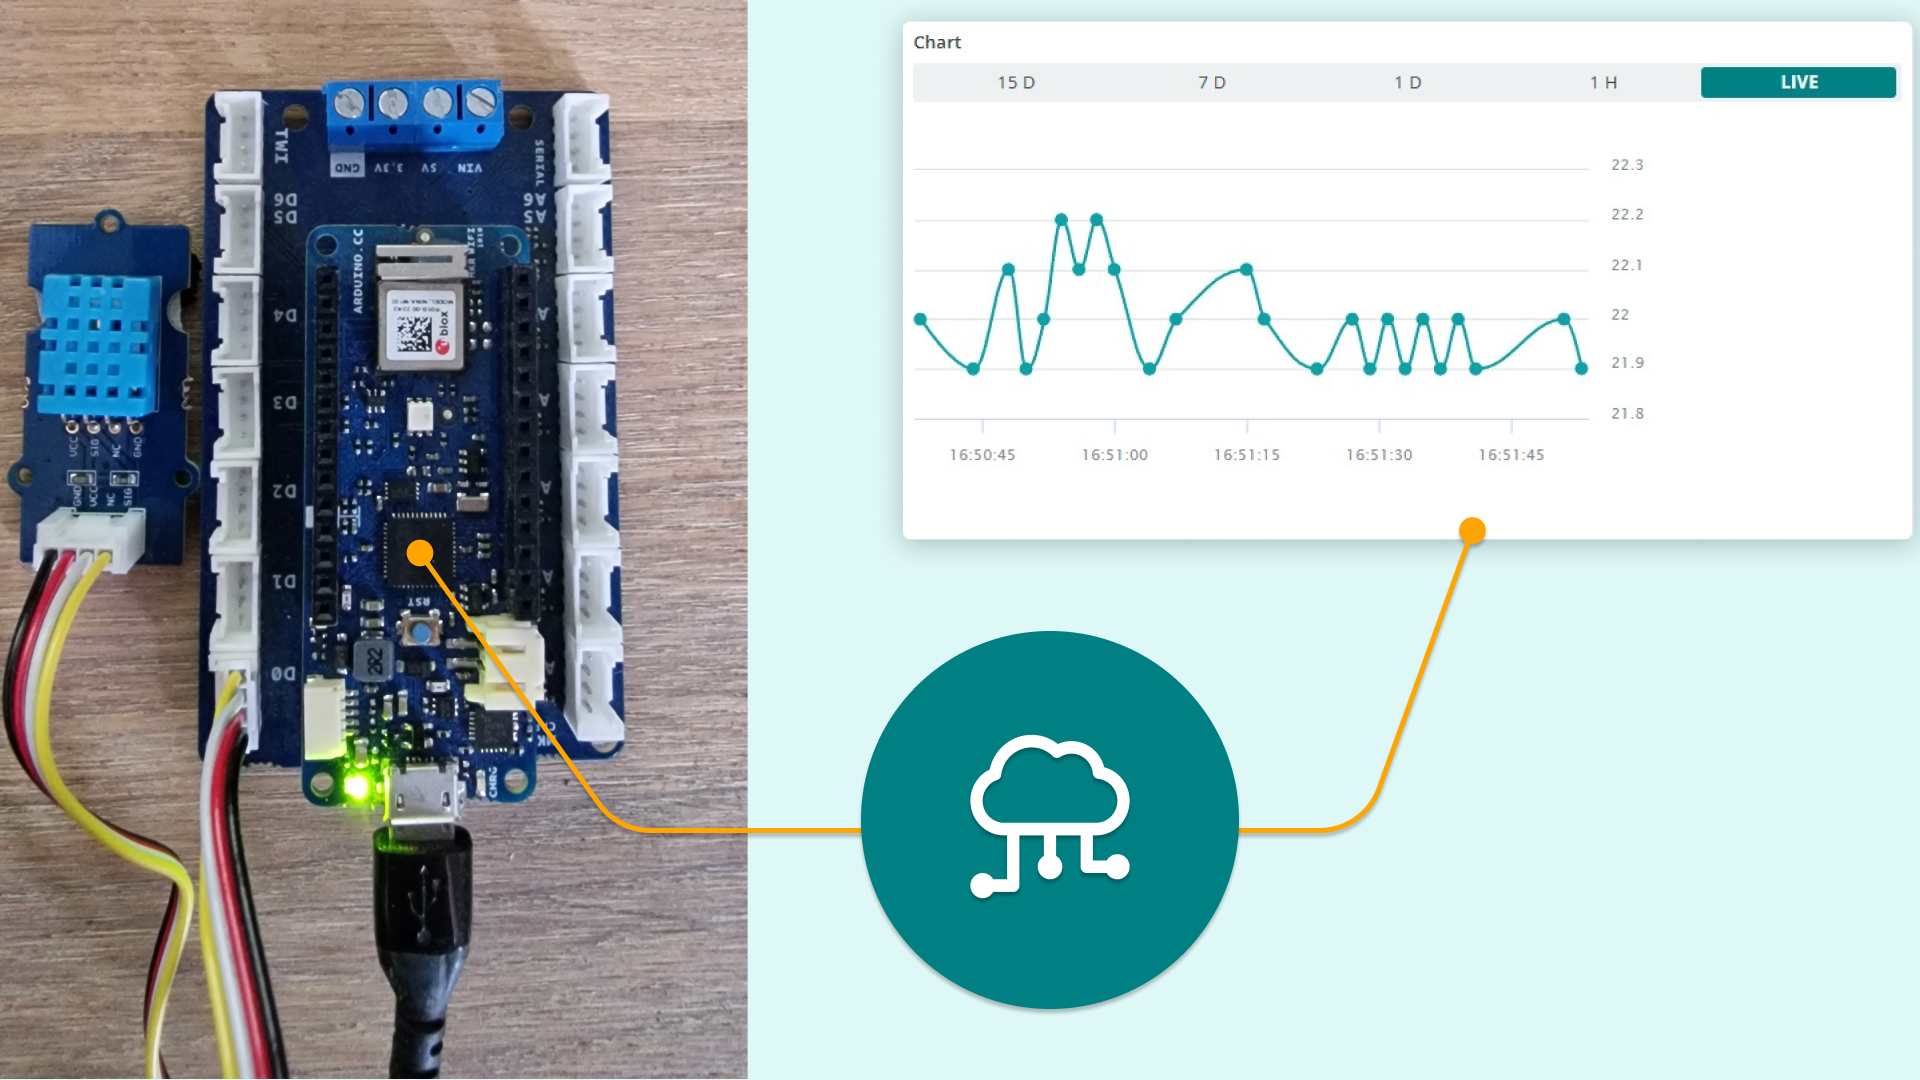
Easy data logging with grove sensors using the MKR Connector Carrier and MKR boards
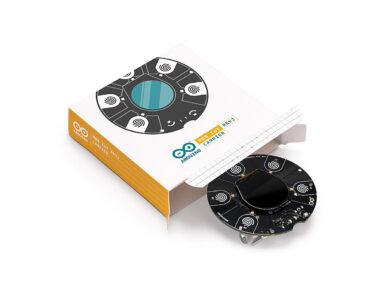
If you’re looking for an ever faster, smoother, and more rewarding way to build your own IoT projects at home, the new MKR IoT Carrier Rev2 could be perfect for you. The new carrier can work with any board from the MKR family, giving you a wide choice of connectivity options to match the needs of your next IoT project. The MKR IoT Carrier Rev2 doesn't require any additional components to get started, and you can create impressive and complete hassle-free projects this way. What does the carrier include? You’ll get all the sensors and actuators you need to develop IoT projects and connect them to the internet, taking your home automation journey to the next level. Let’s take a quick look at what you can build with the MKR IoT Carrier Rev2 and any board from the MKR family. Environment monitoring stations. The new carrier comes with sensors that allow you to map and measure various things in the world around you — temperature, humidity, air quality, barometric pressure, and more. You can also track the movement of the board. For even more sensory awareness, you can connect analog or I2C grove compatible modules to the grove connectors. You can store the data you collect in the SD card or send it directly to the Arduino IoT Cloud. GUI IoT interface. Visualizing your data is incredibly important — and the Rev2 comes with its own OLED color display, allowing you to create your own navigation menus. You can also use the included LEDs and buzzer for feedback. Connect to and control external devices. The IoT is all about networks, and with the Rev2 you can control electronic devices up to 24 Volts using the two on-board relays. You can do this manually — like switching your reading lamp on or off via the Arduino IoT Cloud Remote app, or you can set the lamp to behave according to sensor data like the light levels in the room. The MKR IoT Carrier vs the MKR IoT Carrier Rev2 — what’s the difference? There are a few key differences
FAQs
What is a sensor?
A sensor is an electronic component that can measure its environment. An example of a sensor is the DHT11 sensor, which measures temperature and humidity.
What is an actuator?
An actuator is an electronic component that performs an action. An example of this is an LED, which can be turned on or off, or dimmed to a certain value.
What is a seeed module?
A seeed module is an electronic component attached to a tiny circuit board. This circuit board shares the same connector as all other seeed modules, which makes them easier to connect.
What's a grove connector?
A grove connector is a connector with four wires connected to it. They simply connect to a seeed module, and then to a seeed base shield. This removes the time spent building circuits, and allows you to connect several sensors in just minutes!
How can I use sensors and actuators in Arduino projects?
To use the seeed modules with an Arduino, we need to have a seeed base shield mounted on top of an Arduino UNO board. After it is mounted, we can easily plug in any module we want, and use the ArduinoSensorKit library to program them, using only a few lines of code!
What modules are included in the kit?
-
The LED
-
The Button
-
The Potentiometer
-
The Buzzer
-
The Light Sensor
-
The Sound Sensor
-
The Air Pressure Sensor
-
The Temperature Sensor
-
The Movement Sensor
-
The OLED Screen
Who can use the kit?
The kit is designed to be used even by the most intermediate user. The code is easy to follow and the circuitry is simplified through the use of seeed modules. The kit is also great for more advanced users that wish to reduce time on circuitry and get the job done quickly!
How does the kit work?
The kit includes everything except an Arduino UNO to work. Simply mount the base shield on top of an Arduino UNO, connect a module, and follow the instructions provided in the content platform. The platform explains how to do all of this, and includes code samples to get started with all different modules.
What's the content included?
The content in this kit includes a Getting Started tutorial, that goes through the basics of the kit, and the hardware and software requirements. Followed by that, there are 10 simple Lessons that get you started with all the seeed modules right away!
How do I access the included content?
All the content can be found in the Arduino Sensor Kit platform.
How is the Sensor Kit content structured?
All activities follow the same structure.
-
Introduction - introduces the component.
-
Plug - shows how to create the circuit.
-
Sketch - introduces the program needed for the component.
-
Play - using the component and expected outcome.
-
Understand - further reading on how the component works and related articles.
What languages does the online platform support?
English
What application can you build with the Sensor Kit?
With the components in the Arduino Sensor Kit, you can create many fun applications, such as display interfaces, sound detection, alarm system, light detection, temperature sensing and much more. You can also combine many of the sensors to create unique projects of your own.
What operating system is required?
Windows 7 or higher, Linux, or Mac OS.
What are the minimum software requirements for using the kit?
You need to download the Arduino IDE or sign up to use the Arduino Web Editor.
What are the minimum hardware requirements for using the kit?
An Arduino UNO board is required to mount the base shield on.