


Overview
The Nano Every is Arduino’s 5V compatible board in the smallest available form factor: 45x18mm!
The Arduino Nano is the preferred board for many projects requiring a small and easy to use microcontroller board. One example is low cost robotics, where the Nano is broadly used. If you are in the situation of needing many boards for your classroom, or if you need to present a complex prototype with many functional blocks, this pack will offer you exactly what you need: a series of Arduino Nano Every boards at a discounted price.
The Arduino Nano Every is an evolution of the traditional Arduino Nano, but featuring a lot more powerful processor, the ATMega4809. This will allow you making larger programs than with the Arduino Uno (it has 50% more program memory), and with a lot more variables (the RAM is 200% bigger).
The pack is available in two sizes with either 3 or 6 boards of Arduino Nano Every without headers. Whether you want to minimize the size of your prototypes or share the joy of electronics with your friends, this is the best option you will find.
Get to Know More
To know more about the history of the Nano Every don’t miss the interview with Dario Pennisi, Arduino’s hardware and firmware development manager, who led the development of this board.
Getting Started
The Getting Started section contains all the information you need to configure your board, use the Arduino Software (IDE), and start tinkering with coding and electronics.
Need Help?
Check the Arduino Forum for questions about the Arduino Language, or how to make your own . For any issues when acquiring products at the Arduino store, contact our Store Customer Support. If you purchased the Nano Every Pack and found any issues get in touch with the Official Arduino User Support as explained at our Contact Page.
Warranty
You can find here your board warranty information.
Tech specs
The Arduino Nano Every is based on the ATMega4809 microcontroller.
| Microcontroller | ATMega4809 (datasheet) |
| Operating Voltage | 5V |
| Input Voltage (limit) | 21V |
| DC Current per I/O Pin | 20 mA |
| DC Current for 3.3V Pin | 50 mA |
| Clock Speed | 20MHz |
| CPU Flash Memory | 48KB (ATMega4809) |
| SRAM | 6KB (ATMega4809) |
| EEPROM | 256byte (ATMega4809) |
| PWM Pins | 5 (D3, D5, D6, D9, D10) |
| UART | 1 |
| SPI | 1 |
| I2C | 1 |
| Analog Input Pins | 8 (ADC 10 bit) |
| Analog Output Pins | Only through PWM (no DAC) |
| External Interrupts | all digital pins |
| LED_BUILTIN | 13 |
| USB | Uses the ATSAMD11D14A (datasheet) |
| Length | 45 mm |
| Width | 18 mm |
| Weight | 5 gr (with headers) |
Conformities
Resources for Safety and Products
Manufacturer Information
The production information includes the address and related details of the product manufacturer.
Arduino S.r.l.
Via Andrea Appiani, 25
Monza, MB, IT, 20900
https://www.arduino.cc/
Responsible Person in the EU
An EU-based economic operator who ensures the product's compliance with the required regulations.
Arduino S.r.l.
Via Andrea Appiani, 25
Monza, MB, IT, 20900
Phone: +39 0113157477
Email: support@arduino.cc
Documentation
OSH: Schematics
The Arduino Nano Every is open-source hardware! You can build your own board using the following files:
EAGLE FILES IN .ZIP SCHEMATICS IN .PDF
Pinout Diagram
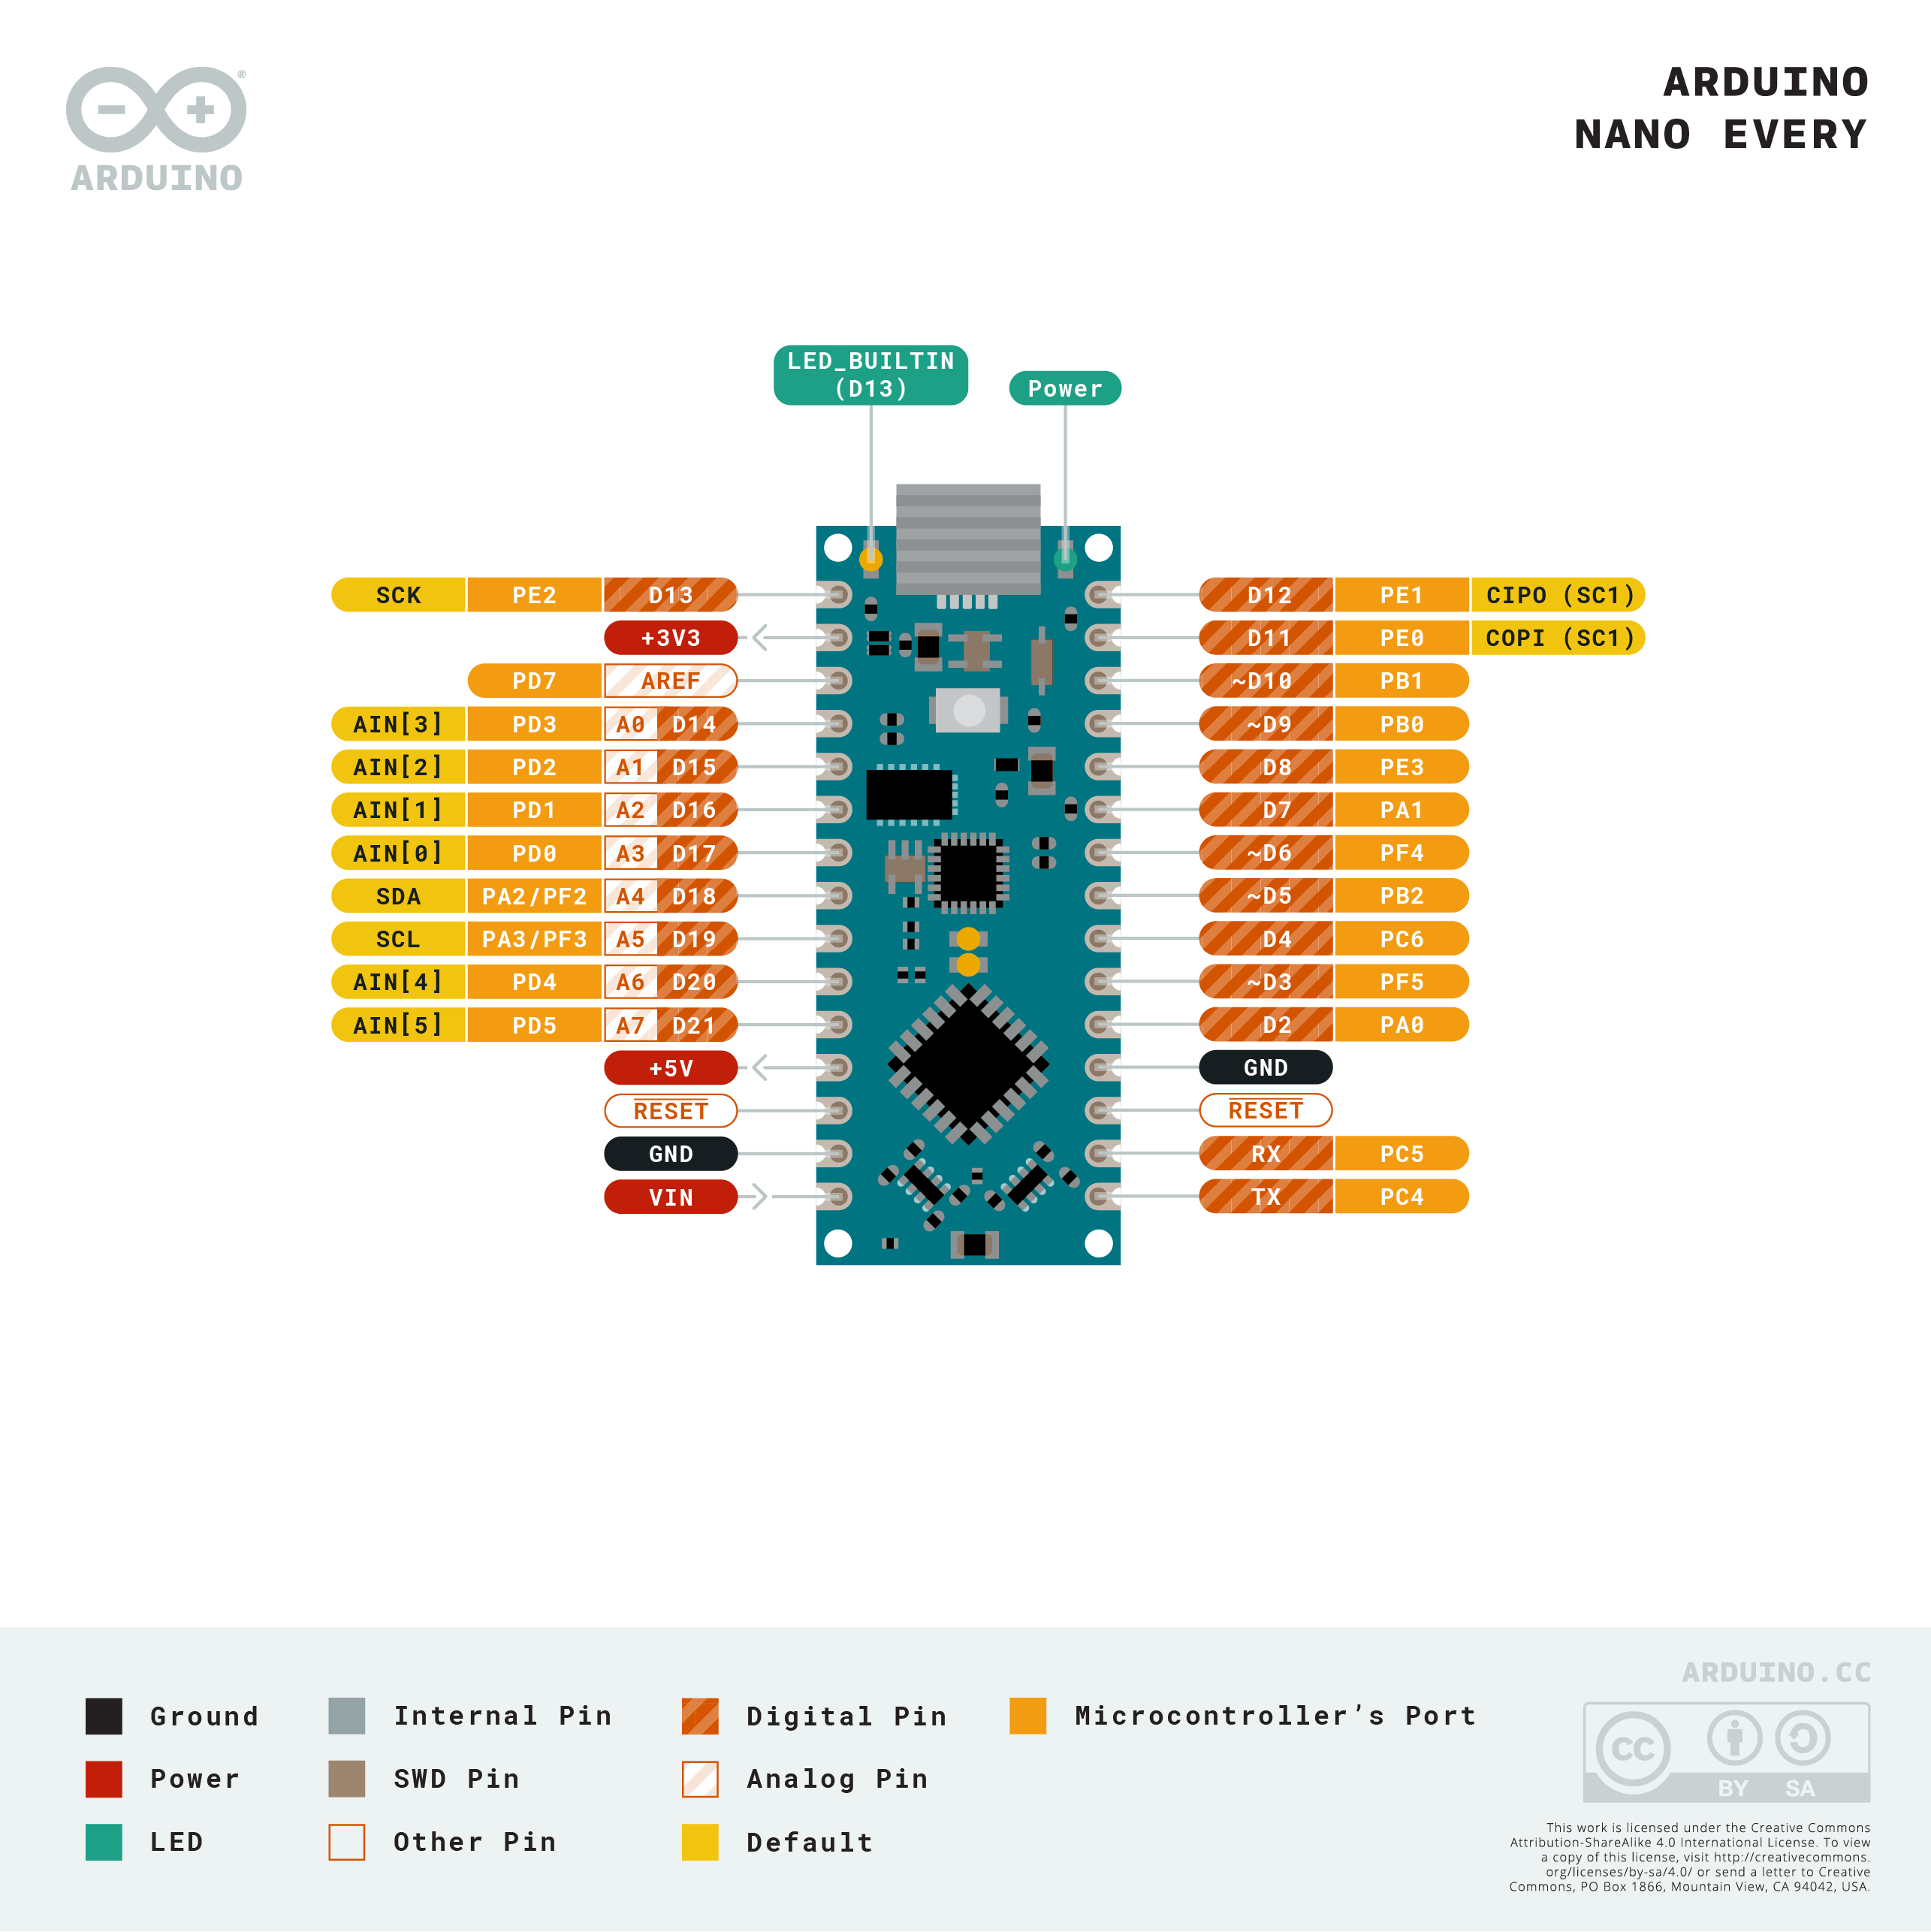
Download the full pinout diagram as PDF here.
Download the Fritzing file here.
Learn more
Get Inspired

Learn to set up an Arduino Nano RP2040 Connect to use MicroPython.
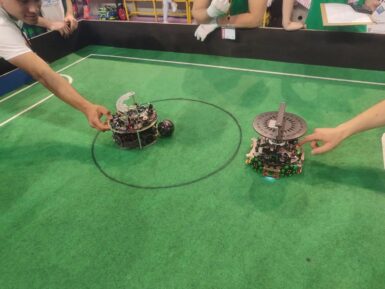
Team Ikaro is a vibrant group of high school students from the Pacinotti Archimede Institute in Rome, sharing a strong passion for electronics and turning heads in the world of robotics! Specializing in Soccer Lightweight games (where robot-soccer players compete to score goals on a miniature field), they clinched the first place at the Romecup 2024 and won Italy’s national Robocup in Verbania earlier this year – earning the right to compete in the world championships in Eindhoven, where they placed third in the SuperTeam competition. The brains behind the bots Utilizing the versatile Arduino Nano RP2040 Connect, the team has crafted highly efficient robots that feature ultrasound sensors, PCB boards, a camera, four motors, a solenoid kicker and omni-directional wheels, all meticulously assembled in the school’s FabLab. Mentored by professor Paolo Torda, Team Ikaro exemplifies the spirit of innovation and teamwork bringing together three talented students: Francesco D’Angelo, the team leader, focuses on system design and mechanics; Flavio Crocicchia, the software developer, ensures the robots’ brains are as sharp as possible; Lorenzo Addario specializes in camera software, making sure the robots can “see” and react swiftly on the field. Their combined efforts have led to a seamless integration of hardware and software, and established a foundation of passion and ambition for future success in their careers. Future goals After their first taste of global competition, Team Ikaro is determined to continue refining their robots, leveraging every bit of knowledge and experience they gain – whether in the classroom, lab, or live challenges. At Arduino, we are proud to sponsor such brilliant young minds and look forward to seeing what they will accomplish next!
FAQs
Batteries, Pins and board LEDs
- Batteries: the Nano Every has no battery connector, nor charger. You can connect any external battery of your liking as long as you respect the voltage limits of the board.
- Vin: This pin can be used to power the board with a DC voltage source. If the power is fed through this pin, the USB power source is disconnected. This pin is an INPUT. Respect the voltage limits to assure the proper functionality of the board.
- 5V: This pin outputs 5V from the board when powered from the USB connector or from the VIN pin of the board.
- 3.3V: This pin outputs 3.3V through the on-board voltage regulator.
- LED ON: This LED is connected to the 5V input from either USB or VIN.


