Overview
This is a 20W adjustable DC-DC buck converter module with digital display.
It is based on LM2596 3A step-down voltage regulator and supports an input of 0~40V DC with an accuracy of ± 0.05V.
On a regular buck converter there is no display and you have to measure the output manually with a multimeter, which can be slow and inefficient.
This buck converter has a display with the output voltage readout integrated right in to the board.
You can change the output by adjusting a screw potentiometer that is also integrated on to the board. Simple!
This module can be used in DC applications such as batteries, power transformers, DIY adjustable power supplies, 24V vehicle power supplies, industrial equipment, 12V to 3.3V, 12V to 5V, 24V to 5V, 24V to 12V, 36V to 24V and so on.
The on-board voltage meter supports self-calibration mode. You only need to calibrate it once and the value will be stored automatically.
The method is as follows:
1. Hold the button for 3 seconds. Release the button to enter input voltage calibration mode (“IN”is ON);
Hold the button for 3 seconds and release the button to enter output voltage calibration mode (“OUT” is ON);
Hold the button for 3 seconds, and release the button to exit calibration mode, all parameters will be save automatically.
2. In calibration mode, click the button to adjust the value.
- Supports self-calibration function to provide high-precision voltage output. (Recommended input voltage is maintained at 4.5V or more)
- Touch the button to switch the measurement input or output voltage, and an indicator shows which voltage is being measured.
- The display can be disabled if necessary. Hold the button for 2 seconds, and release the button to turn off the display
- With wire terminals, no soldering is necessary
- The input voltage is 4.0 ~ 40V. (The input voltage must be 1.5V higher than the output voltage)
- Continuously adjustable output voltage range of 1.25V ~ 37V. (The input voltage must be 1.5V higher than the output voltage)
- The Maximum output current is 3A, it is recommended to use within 2.0A, higher currents will need a heatsink to dissipate heat.
- The output power is 20W. For more than 15W a heatsink is recommended.
- The unit offers high conversion efficiency, with an average of 88%
- The unit includes reverse polarity protection, overheating protection and short circuit protection
Tech specs
- Input Voltage: 4.0 ~ 40V
- Output Voltage: 1.25V ~ 37V
- Output Power: 20W
- Output Current: 3A
- Mounting Dimensions: 6.1 * 3.1cm/ 2.4 * 1.22 inches
Get Inspired

Exploring the digital twin synthetic data generation and AI-oriented advancements on real-world shipping operations w/ NVIDIA Omniverse.

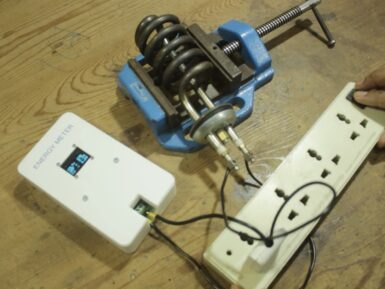
The primary appeal of microcontrollers is their versatility. They are, essentially, the embedded equivalent of computers — general purpose devices that can perform a wide range of functions. And to get the most out of a microcontroller, you’ll also want connectivity suitable for your application. That’s why we released the Arduino Nano Matter and YouTuber Mr Innovative has shared a great video illustrating how easy it is to build an energy meter using this new development board. The Nano Matter is based on the powerful Silicon Labs MGM240S, which has an Arm Cortex-M33 processor and support for a number of wireless connectivity options, including 802.15.4 (Zigbee and Thread), Bluetooth® Low Energy 5.3, Bluetooth® Mesh, and Matter. That makes the Nano Matter perfect for smart home and other Internet of Things applications. To demonstrate that, Mr Innovative created an energy meter that would be useful to many people around the world. This unit monitors the power flowing to any device or appliance connected to mains AC power. It displays information about that power consumption on a small OLED screen, and also sends the data over Bluetooth to a connected smartphone for logging. The Nano Matter can’t monitor mains AC voltage directly, so Mr Innovative used a ZMCT103C current transformer for the job. The Arduino receives its power from a 9V battery and the components fit inside a 3D-printed enclosure. A printed sticker label gives that a nice, smooth top finish.


