


Overview
The Nano Every is Arduino’s 5V compatible board in the smallest available form factor: 45x18mm!
The Arduino Nano is the preferred board for many projects requiring a small and easy to use microcontroller board. One example is low cost robotics, where the Nano is broadly used. If you are in the situation of needing many boards for your classroom, or if you need to present a complex prototype with many functional blocks, this pack will offer you exactly what you need: a series of Arduino Nano Every boards at a discounted price.
The Arduino Nano Every is an evolution of the traditional Arduino Nano, but featuring a lot more powerful processor, the ATMega4809. This will allow you making larger programs than with the Arduino Uno (it has 50% more program memory), and with a lot more variables (the RAM is 200% bigger).
The pack is available in two sizes with either 3 or 6 boards of Arduino Nano Every without headers. Whether you want to minimize the size of your prototypes or share the joy of electronics with your friends, this is the best option you will find.
Get to Know More
To know more about the history of the Nano Every don’t miss the interview with Dario Pennisi, Arduino’s hardware and firmware development manager, who led the development of this board.
Getting Started
The Getting Started section contains all the information you need to configure your board, use the Arduino Software (IDE), and start tinkering with coding and electronics.
Need Help?
Check the Arduino Forum for questions about the Arduino Language, or how to make your own . For any issues when acquiring products at the Arduino store, contact our Store Customer Support. If you purchased the Nano Every Pack and found any issues get in touch with the Official Arduino User Support as explained at our Contact Page.
Warranty
You can find here your board warranty information.
Tech specs
The Arduino Nano Every is based on the ATMega4809 microcontroller.
| Microcontroller | ATMega4809 (datasheet) |
| Operating Voltage | 5V |
| Input Voltage (limit) | 21V |
| DC Current per I/O Pin | 20 mA |
| DC Current for 3.3V Pin | 50 mA |
| Clock Speed | 20MHz |
| CPU Flash Memory | 48KB (ATMega4809) |
| SRAM | 6KB (ATMega4809) |
| EEPROM | 256byte (ATMega4809) |
| PWM Pins | 5 (D3, D5, D6, D9, D10) |
| UART | 1 |
| SPI | 1 |
| I2C | 1 |
| Analog Input Pins | 8 (ADC 10 bit) |
| Analog Output Pins | Only through PWM (no DAC) |
| External Interrupts | all digital pins |
| LED_BUILTIN | 13 |
| USB | Uses the ATSAMD11D14A (datasheet) |
| Length | 45 mm |
| Width | 18 mm |
| Weight | 5 gr (with headers) |
Conformities
Resources for Safety and Products
Manufacturer Information
The production information includes the address and related details of the product manufacturer.
Arduino S.r.l.
Via Andrea Appiani, 25
Monza, MB, IT, 20900
https://www.arduino.cc/
Responsible Person in the EU
An EU-based economic operator who ensures the product's compliance with the required regulations.
Arduino S.r.l.
Via Andrea Appiani, 25
Monza, MB, IT, 20900
Phone: +39 0113157477
Email: support@arduino.cc
Documentation
OSH: Schematics
The Arduino Nano Every is open-source hardware! You can build your own board using the following files:
EAGLE FILES IN .ZIP SCHEMATICS IN .PDF
Pinout Diagram
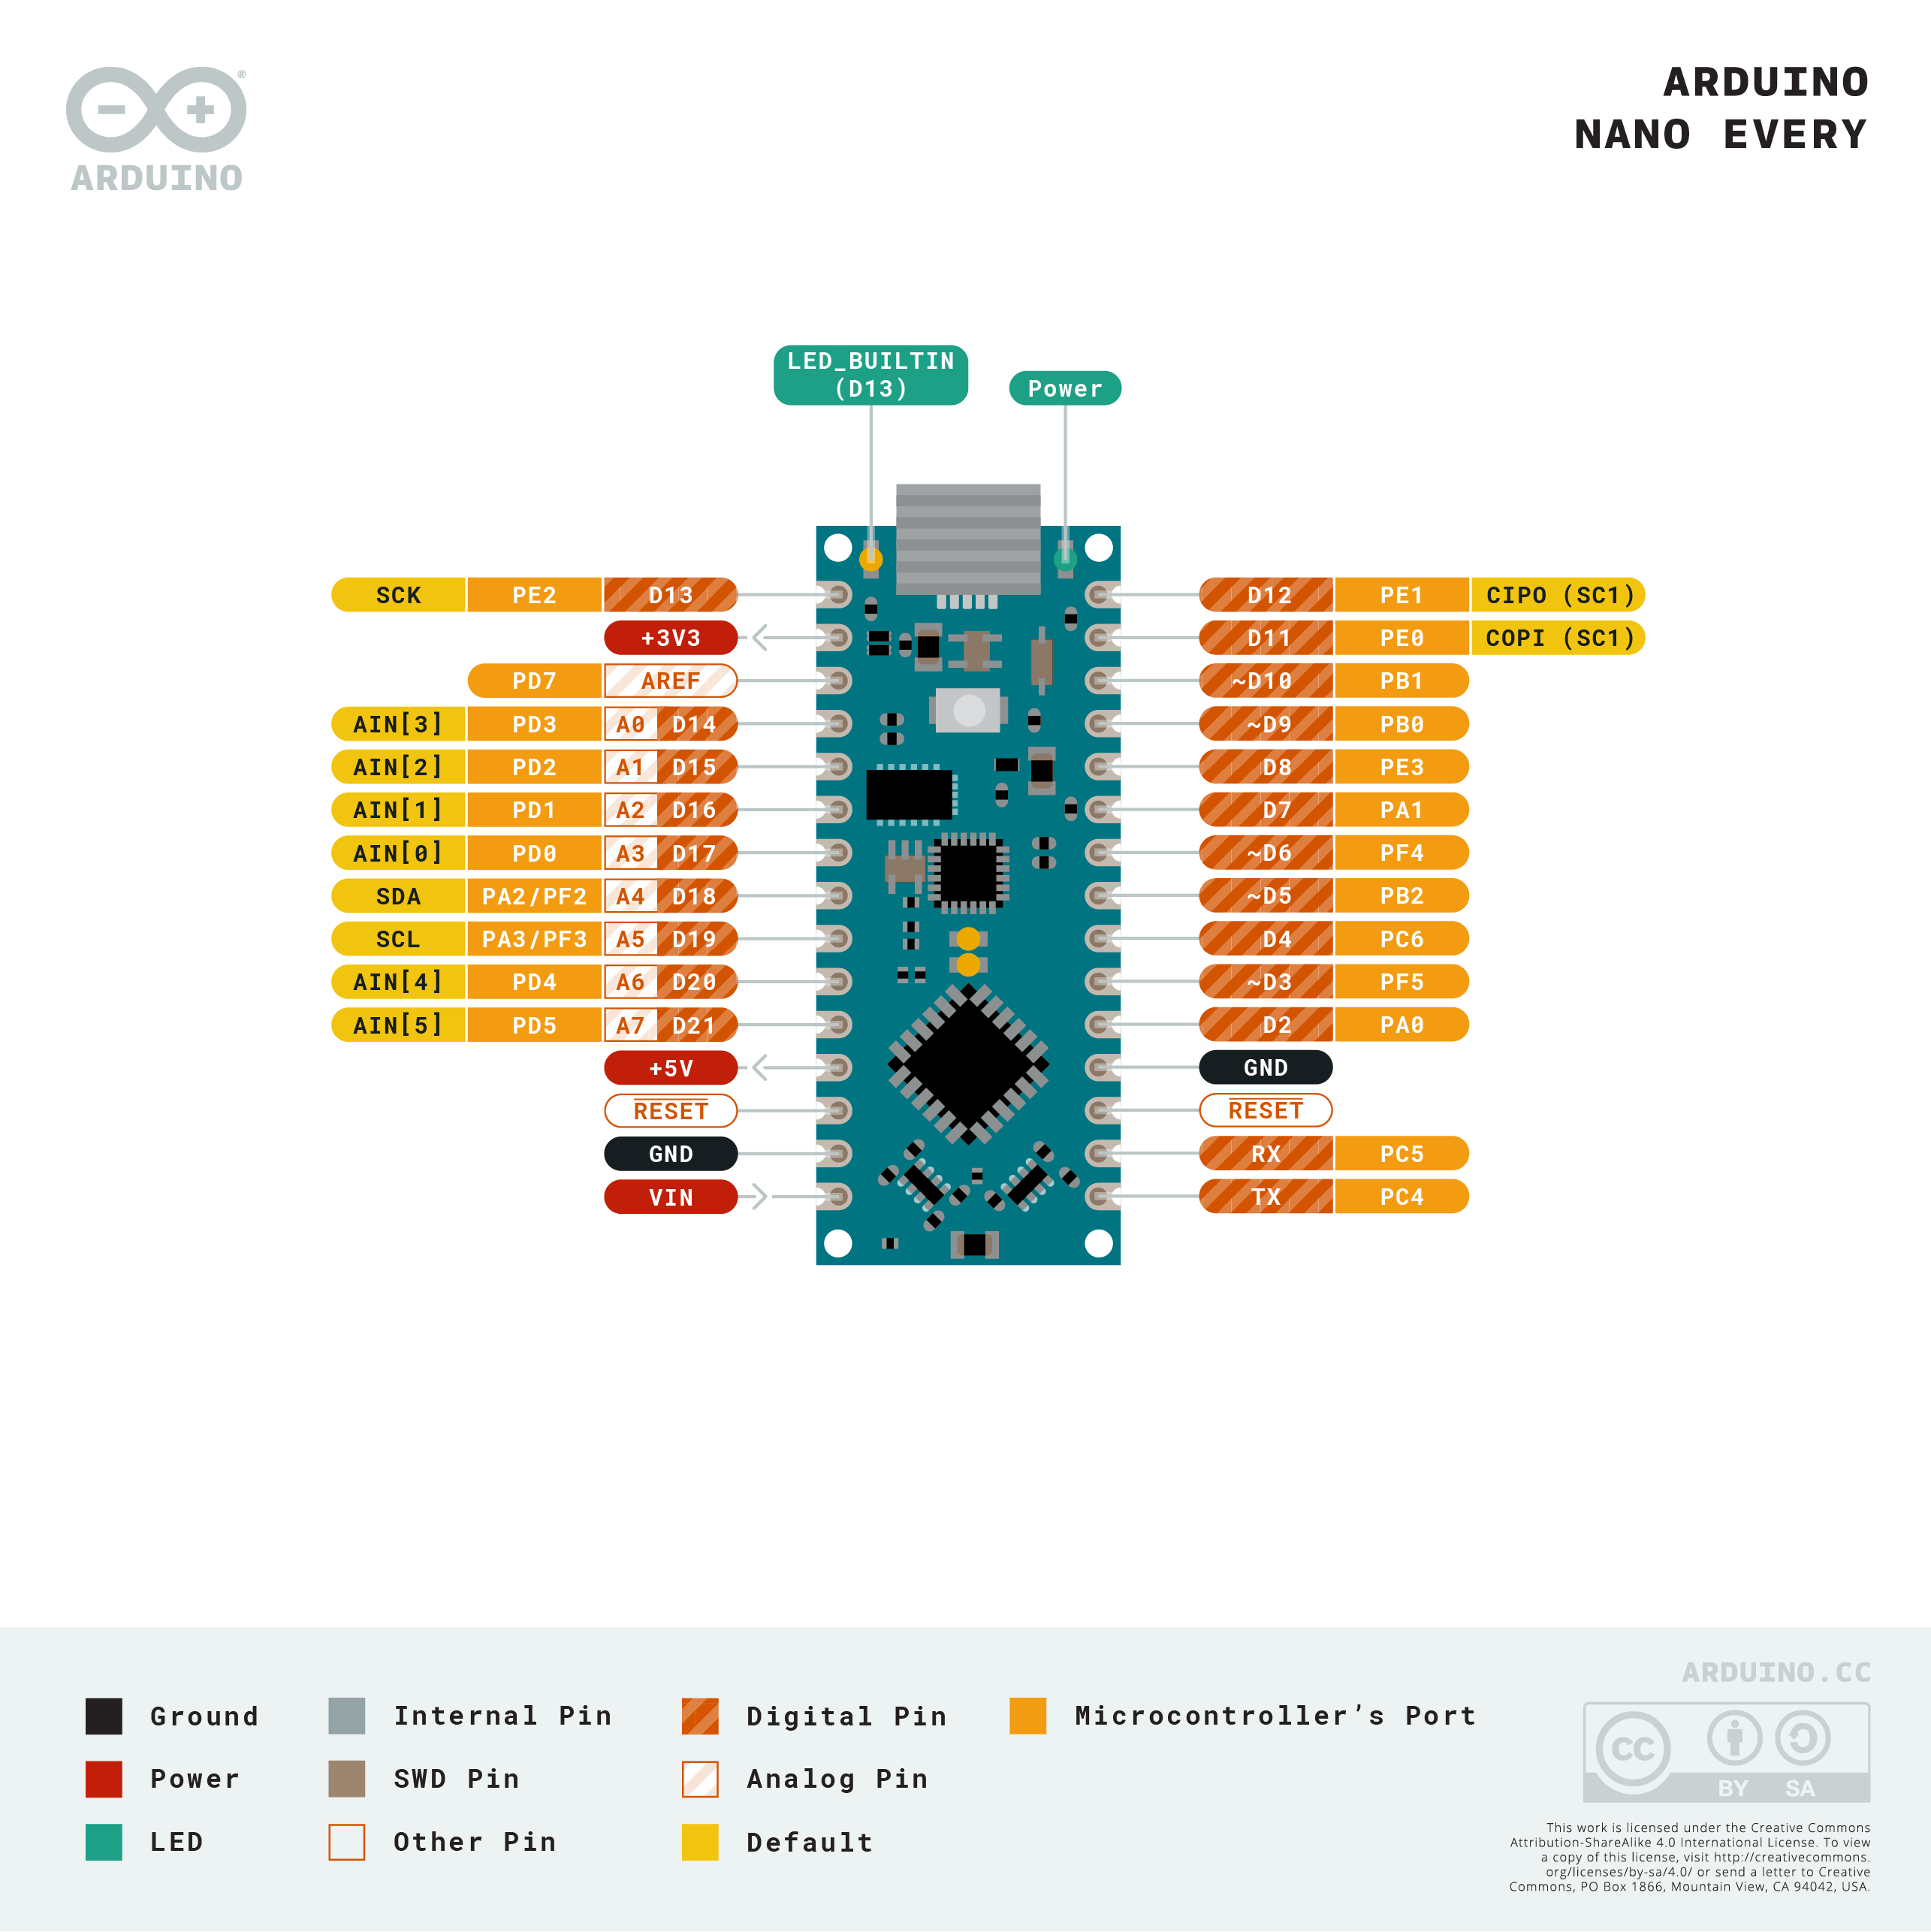
Download the full pinout diagram as PDF here.
Download the Fritzing file here.
Learn more
Get Inspired
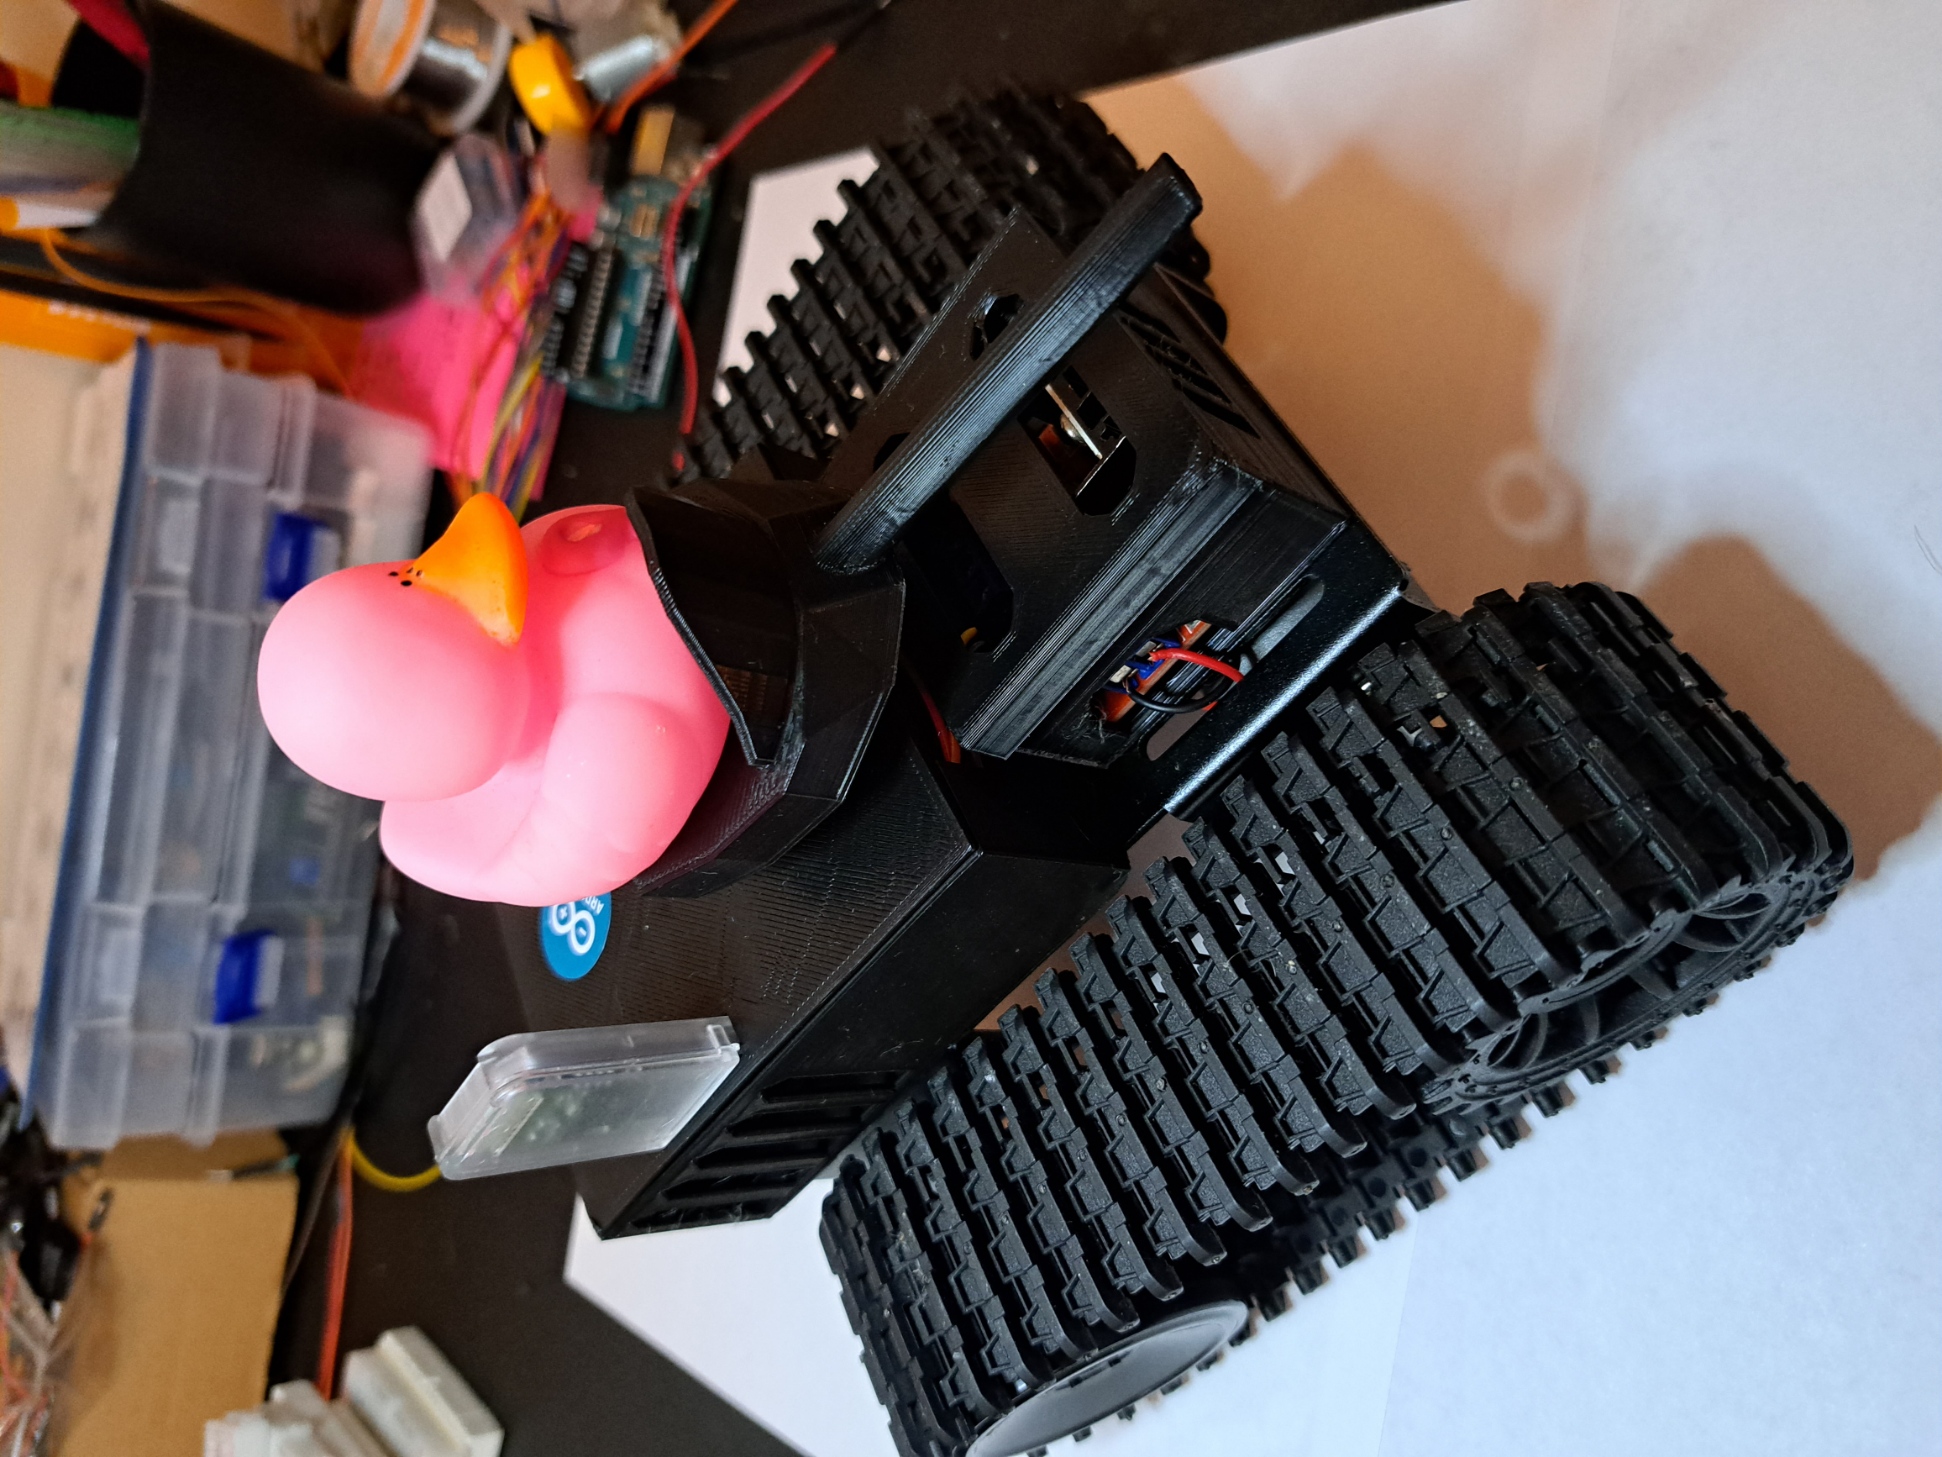
I'm excited to share the details of my BT Arduino Tank project, which incorporates some impressive 3D-printed components. While the main chassis of the tank was not 3D-printed, I utilized this technology to create two crucial parts: the enclosure for the motor driver and the compartment housing the remaining electronics. Additionally, I 3D-printed a cannon for an added touch of customization. The enclosure for the motor driver served as a protective housing, ensuring that the L298N motor driver module was securely mounted and shielded from external elements. By designing and 3D-printing this part, I could precisely fit it to the tank's specifications, providing a neat and organized arrangement of the electronics. In the same vein, the compartment for the remaining electronics, such as the Arduino Nano Every and the HC-05 Bluetooth module, was also 3D-printed. This enclosure offered a clean and organized solution for housing these components, safeguarding them while maintaining easy access for maintenance or modifications. Lastly, to enhance the tank's appearance and add a touch of personalization, I designed and 3D-printed a cannon. This custom-printed cannon perfectly complemented the overall design, making the tank even more visually appealing. By strategically incorporating 3D printing into specific parts of the project, I achieved a balance between functionality and customization. The precision and versatility of 3D printing allowed me to create tailored enclosures and a unique cannon, elevating the overall aesthetic and practicality of my BT Arduino Tank project.
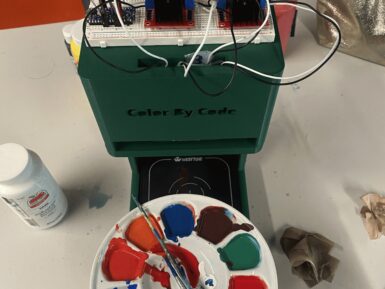
When you want to paint the walls in your bedroom that very specific shade of Misty Irish Green, all you have to do is head to your local hardware store and have them scan the corresponding card. The paint-mixing machine will then add the pigment to a white base and, a few minutes later, you have that exact color. So, shouldn’t you be able to do the same thing with acrylic paint for hobby purposes? Now you can, thanks to the “Color By Code” machine designed by Caltech students Frida Moreno and Asmat Kaur Taunque. Moreno and Taunque built Color By Code for a class project and it is, essentially, a hobby version of those hardware store paint-mixers intended for acrylic paint. As is the standard across many industries that deal with pigments, paint, and printing, this works using CMYK (cyan, magenta, yellow, key) color mixing. Here, the key is black and the machine takes an input color value for each component, then dispenses the paint in those ratios to achieve the desired hue. That all happens under the control of an Arduino Nano Every board. That operates peristaltic pumps, via L298N motor drivers, that dispense each color. Afterwards, a flushing procedure clears the lines before the next mix. The pumps fit into a 3D-printed stand, with the hoses dropping below to a waiting container. At this time, the user must set the color values through serial commands. But the team hopes to create a Bluetooth app in the future. They also plan to add a weight sensor, which would improve the machine’s accuracy.
FAQs
Batteries, Pins and board LEDs
- Batteries: the Nano Every has no battery connector, nor charger. You can connect any external battery of your liking as long as you respect the voltage limits of the board.
- Vin: This pin can be used to power the board with a DC voltage source. If the power is fed through this pin, the USB power source is disconnected. This pin is an INPUT. Respect the voltage limits to assure the proper functionality of the board.
- 5V: This pin outputs 5V from the board when powered from the USB connector or from the VIN pin of the board.
- 3.3V: This pin outputs 3.3V through the on-board voltage regulator.
- LED ON: This LED is connected to the 5V input from either USB or VIN.


