Overview
With this carrier in combination with any board from the MKR family, you can quickly create your next IoT project without any extra components. This carrier has all you need in sensors and actuators to create cool projects connected to the Internet.
Using the MKR IoT Carrier Rev2 in combination with any board of the MKR family, you can quickly build:
- Environment monitoring stations: Using the sensors on the carrier, you can map different phenomena around you. You can easily measure temperature, humidity, barometric pressure and air quality or detect the movement of the board, and in case you want to expand the sensor you can use any of the grove connectors to connect analog or I2C grove compatible modules. All this information can be stored in the SD card or sent directly to the Arduino IoT Cloud.
- GUI IoT interface: Even if you want to visualize sensor data or design your own user interface, you can use the OLED color display to create your own navigation menus or use the LEDs and the buzzer for feedback.
- Control external devices: Control electronic appliances up to 24 Volts using the two on-board relays. Either you want to turn on or off your reading lamp remotely through the Arduino IoT Cloud Remote app or use any of the sensor data to affect the behavior of the lamp.
Tech specs
| Humidity, temperature barometric and VOC sensor | BME688 |
| IMU | LSM6DSOX |
| Ambient light, proximity, color and gesture sensor | APDS-9960 |
| Capacitive buttons | 5 (Qtouch Pad) |
| Actuators | Buzzer, 5 RGB LEDs |
| 24V Relays | 2 (V23079) |
| Display | KD013QVFMD002-01 |
| Grove connectors | 2 connected to analog pins (A0/A6), 1 connected to I2C |
| Micro SD card slot | Micro SD card not included |
| Battery holder | 18650 Li-Ion rechargeable battery (battery not included) |
Resources for Safety and Products
Manufacturer Information
The production information includes the address and related details of the product manufacturer.
Arduino S.r.l.
Via Andrea Appiani, 25
Monza, MB, IT, 20900
https://www.arduino.cc/
Responsible Person in the EU
An EU-based economic operator who ensures the product's compliance with the required regulations.
Arduino S.r.l.
Via Andrea Appiani, 25
Monza, MB, IT, 20900
Phone: +39 0113157477
Email: support@arduino.cc
Documentation
Learn more
Get Inspired

Display real-time meeting room availability, synchronized with Google Calendar through Arduino IoT Cloud.

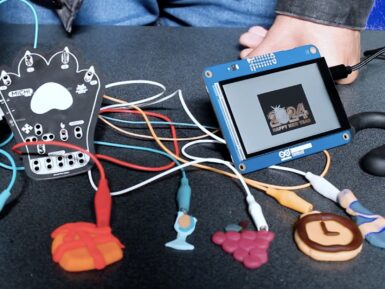
Watching back a slideshow of some of your favorite times of the past years is a great way to reflect on what’s happened and get excited for the future. The Electronic Cats crew wanted to incorporate this concept into a more simplified, interactive form which resulted in the Garrita project. Garrita is a homemade platform that lets an Arduino GIGA R1 WiFi with GIGA Display Shield transform into a highly mobile slideshow thanks to its larger onboard memory capacity and convenient layout. This year, the Electronic Cats were able to take their image shifter concept even further with Michi: an existing project that turns any conductive object into a capacitive touch-sensing controller. Whenever one of Michi’s inputs are toggled, the board sends a signal to the GIGA R1 WiFi that causes the current slide to advance to the next one. In order to go from a locally stored image to something on the Display Shield, users first transform their images into a more suitable format via the LVGL conversion tool. Once downloaded, the resulting files can be easily bundled into a Sketch before they become accessible in the application code. To see more about how the Electronic Cats built Garrita, you can read their write-up here on Hackster.io.
FAQs
What are the main differences between MKR IoT Carrier and MKR IoT Carrier Rev2?
Some sensors have changed between both versions:
- The humidity sensor (HTS221) and barometric pressure sensor (LP22HB) was replaced with the BME6688 sensor.
- The IMU (LSM6DS3) was replaced with LSM6DSOX.
Some other components have been repositioned:
- Addition of a reset button
- 90° rotation of the relay connectors
- Repositioning of the light sensor (APDS-9960)
- Change of pins assigned to control the relays to pin 1 and 2
- Change grove connector assignment from pin A5 to A6
Do I have to change my sketch if I have been using the first revision of the MKR IoT Carrier?
The MKR IoT Carrier library is compatible with both revisions of the carrier, just make sure to use the latest version of the library.


