

J-Link PLUS Compact
Sold outUSB powered JTAG debug probe supporting a large number of CPU cores.
Based on a 32-bit RISC CPU, it can communicate at high speed with the supported target CPUs.
SEGGER J-Link PLUS Compact is used around the world in tens of thousand places for development and production (flash programming) purposes.
Overview
Get the SEGGER J-Link PLUS Compact debug probe: a compact version of the J-Link PLUS. Mounts securely & unobtrusively into development and end user equipment.
Based on 32-bit RISC CPU, it communicates at high speed with supported target CPUs.
Thanks to a small size with two mounting holes, it can be placed into existing equipment housings.
Space can also be reserved for direct-to-PCB mounting.
All major IDEs (Eclipse & GDB-based IDEs) support J-Link debug probes, as does SEGGER Embedded Studio. 500,000 J-Links have been shipped so far, making this probably the most popular debug probe on the market for Arm cores and the de-facto standard.
Further Advantages
The SEGGER J-Link PLUS Compact has a built-in VCOM functionality and integrated licenses for unlimited breakpoints in flash memory, RDI/RDDI and J-Flash. It supports direct download into RAM and flash memory. It has a broad range of supported microcontrollers and CPUs.
Box Contents
- SEGGER J-Link PLUS Compact debug probe
- Micro USB cable
- 1" 20-pin ribbon cable (18 cm)
- Includes free software updates and one year of email support.
SEGGER J-Link debuggers are the most popular choice for optimizing the debugging and flash programming experience.
Documentation
Debugging with the Arduino IDE 2.0
Learn how to set up a Zero board, J-Link and Atmel-ICE debuggers with the Arduino IDE 2.0, and how to debug a program.
Using the Segger J-Link debugger with the MKR boards
Learn how to set up a MKR board with the Segger J-link debugger.
Get Inspired
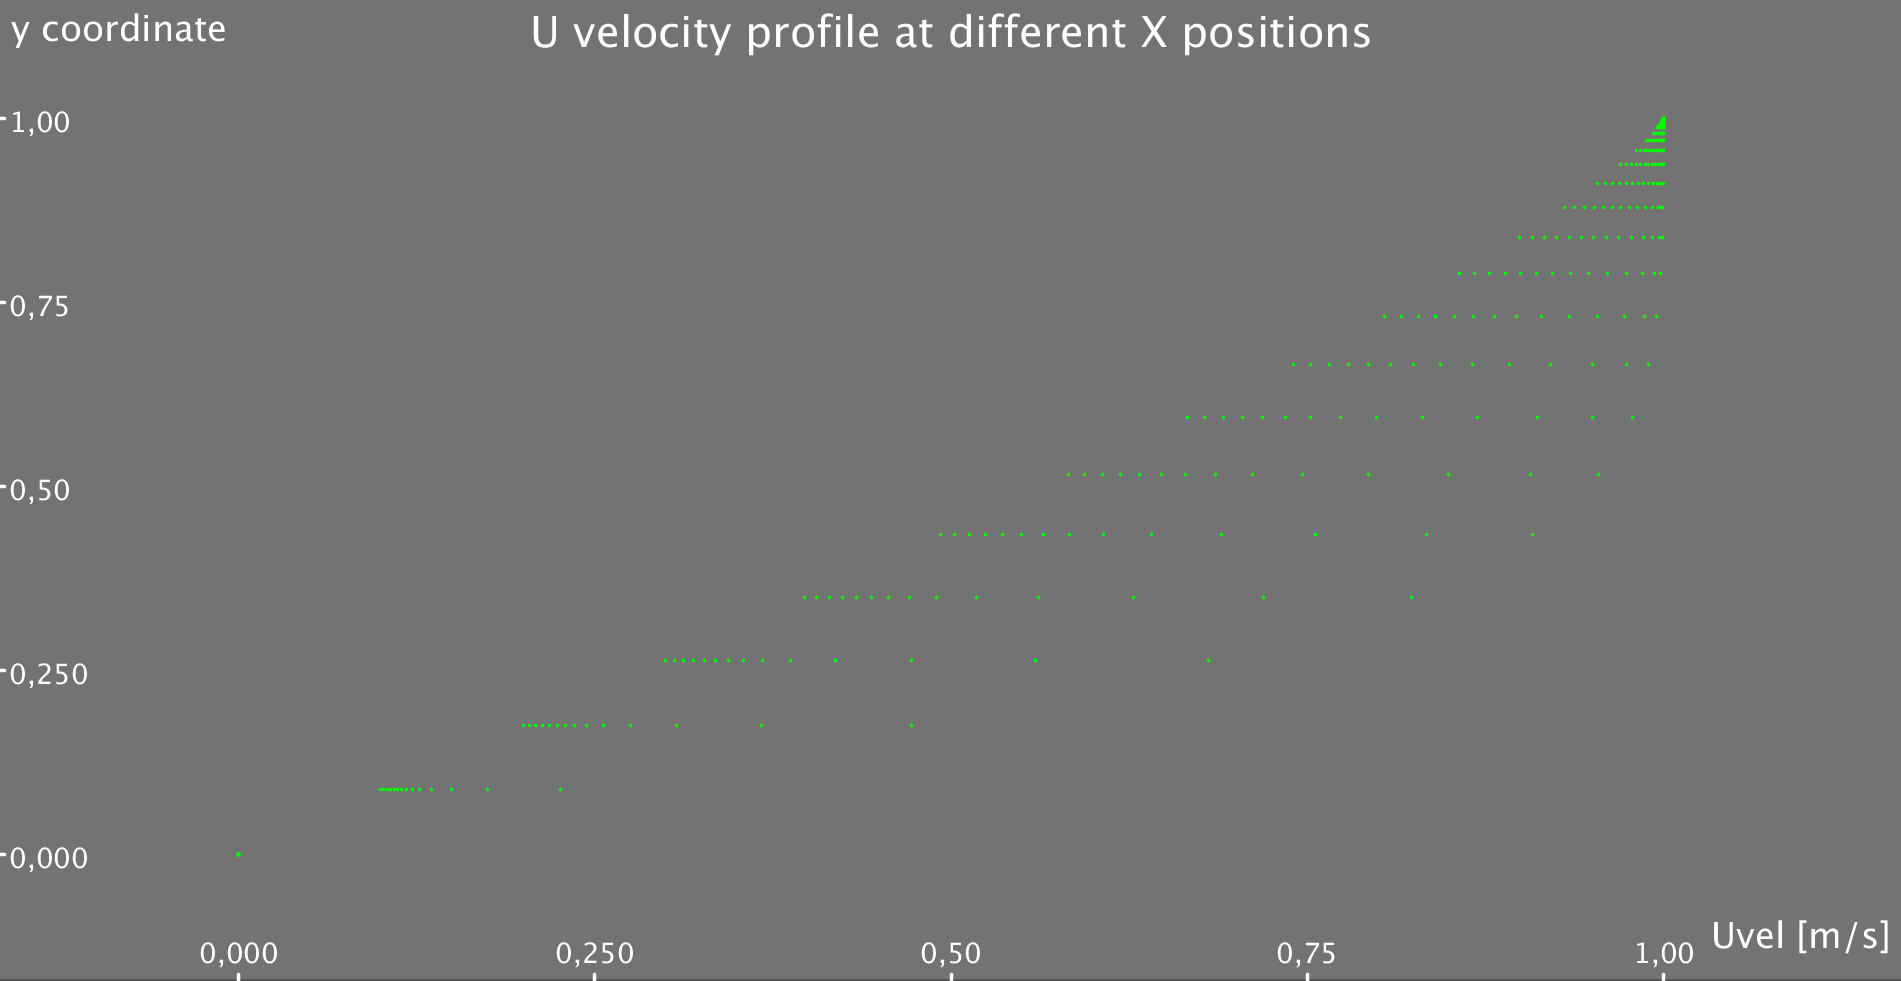
Simple Code that allows you to solve the 2D flow equation for a flat plate Boundary Layer!!
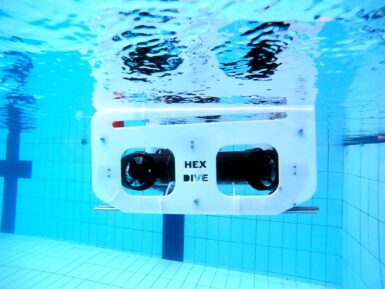
Who doesn’t want to explore underwater? To take a journey beneath the surface of a lake or even the ocean? But a remotely operated vehicle (ROV), which is the kind of robot you’d use for such an adventure, isn’t exactly the kind of thing you’ll find on the shelf at your local Walmart. You can, however, follow this guide from Ranuga Amarasinghe to build your own ROV for some aquatic fun. Amarasinghe is a 16-year-old Sri Lankan student and this is actually the second iteration of his ROV design. As such, he's dubbed it “ROV2” and it appears to be quite capable. All of its electronics sit safely within a 450mm length of sealed PVC tube. That mounts onto the aluminum extrusion frame structure that also hosts the six thrusters powered by drone-style brushless DC motors. ROV2’s brain is an Arduino Mega 2560 board and it drives the BLDC motors through six electronic speed controllers (ESCs). It receives control commands from the surface via an umbilical. The operator holds a Flysky transmitter that sends radio signals to a receiver floating on the water. An Arduino UNO Rev3 reads those and then communicates the motor commands to the Mega through the tethered serial connection. That limits the maximum length of the tether to about 40 meters, which subsequently limits the maximum operating depth. With the specified lithium battery pack, ROV2 can traverse the depths for 30-45 minutes. And when equipped with the 720p FPV camera, pilots can see and record all of the underwater action.


