


Arduino IoT Bundle
The Arduino IoT Bundle is the best way to start exploring the world of connected devices using the Arduino Nano RP2040 Connect. Follow the 5 step by step tutorials to quickly learn how to build IoT devices.
Overview
Follow the 5 step by step tutorials we have prepared for you and combining the electronic components included in the bundle, you’ll quickly learn how to build devices that connect to the Arduino IoT Cloud.
The 5 step by step tutorials are:
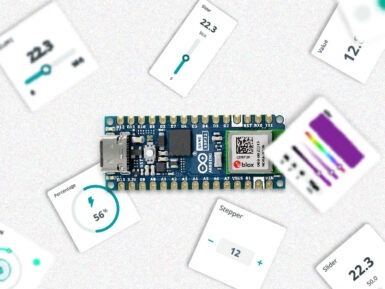
Arduino IoT Cloud Compatible

Tech specs
Each bundle includes:
- 1 Arduino Nano RP2040 Connect
- 1 micro USB cable
- 1 400-point breadboard
- 70 solid-core jumper wires
- 2 stranded jumper wire
- 6 phototransistors
- 3 potentiometers (10k ohm)
- 10 pushbuttons
- 1 temperature sensor (TMP36)
- 1 tilt sensor
- 1 alphanumeric LCD (16 x 2 characters)
- 1 bright white
- 28 LEDs (1 RGB, 8 red, 8 green, 8 yellow, 3 blue)
- 1 small DC motor (6/9V)
- 1 small servo motor
- 1 piezo capsule (PKM17EPP-4001-B0)
- 1 H-bridge motor driver (L293D)
- 1 optocouplers (4N35)
- 2 MOSFET transistors (IRF520)
- 5 capacitors (100uF)
- 5 diodes (1N4007)
- 1 male pin strip (40 x 1)
- 20 resistors (220 ohm)
- 5 resistors (560 ohm)
- 5 resistors (1k ohm)
- 5 resistors (4.7k ohm)
- 20 resistors (10k ohm)
- 5 resistors (1M ohm)
- 5 resistors (10M ohm)
Resources for Safety and Products
Manufacturer Information
The production information includes the address and related details of the product manufacturer.
Arduino S.r.l.
Via Andrea Appiani, 25
Monza, MB, IT, 20900
https://www.arduino.cc/
Responsible Person in the EU
An EU-based economic operator who ensures the product's compliance with the required regulations.
Arduino S.r.l.
Via Andrea Appiani, 25
Monza, MB, IT, 20900
Phone: +39 0113157477
Email: support@arduino.cc
Get Inspired
My project has a Nodemcu ESP8266 which is controlling a 7-segment display through the http server using html form.
… remote monitoring and control. 2. Embed a web server in the device Embedding a web server inside the IoT device allows you to visualize the data using a web browser. It requires the device to have network connectivity, and it is usually implemented connecting the device to a Wi-Fi access point or with the device creating its own WiFi hotspot. Although creating your own web server implementation can be done, one of the most widespread solutions is to make use of the library ESPAsyncWebServer. It allows your IoT device to serve custom HTML pages presenting the data. This is a very flexible and customizable solution, yet complex and mostly suitable for skilled users. There are plenty of insightful examples like the following ones: ESP32 Web Server - Arduino IDE | Random Nerd TutorialsArduino Project Hub - NodeMCU ESP8266 AJAX Enabled Web Server Arduino Project Hub - WiFi Robot Car / RC Car NodeMCU Web ServerESP32 Web Server: Display Sensor Readings in Gauges | Random Nerd Tutorials The scope of this solution is typically local — you need to be on the same network as the device — although with a more advanced configuration by enabling port forwarding in the router, the device could be accessed remotely from anywhere. One of the main advantages is its low latency, as the data shown in the web page comes directly from the device without any processing. On the other hand, it is a solution that requires a high programming skill level and additionally, due to the immutable nature of the firmware, every change in a dashboard requires code recompilation and firmware reflashing. Furthermore, embedding a web server or a Bluetooth stack within the device can be resource-intensive. This may limit the device's capabilities or require a more powerful microcontroller, increasing both cost and complexity. 3. Send data to an external system with plotting capabilities IoT devices can send data to external systems using different protocols, such as
FAQs
I plugged the board to my PC / MAC but I cannot see the serial port listed in the IDE, so I can't upload my sketch to the board!
- Make sure the foam that protects the boards’ pins is removed.
- Try connecting the board with another USB cable.
- Try connecting the board to another USB port. If possible, avoid USB-hubs.
You can see more information and other things to try in this Help Center article.
Do I need to subscribe to the Arduino IoT Cloud to build the projects described in the tutorials?
No, all the projects can be built using the free plan of the Arduino IoT Cloud. Click here to see what is included in the plan.
How to enable the 5V / VUSB pin?
The 5V pin is disabled by default. You can locate on the bottom of the board on the VBUS pin two pads, shorting these will enable 5V output. More info on this here.
Where can I find the step by step tutorials?
You can find the step by step tutorials at arduino.cc/iot-bundle


