Overview
DYNAMIXEL Shield for Arduino MKR allows users to easily use ROBOTIS’ DYNAMIXEL Series along with Arduino MKR Boards.
The features are as follows:
- Compatible with Arduino MKR
- Compatible with ROBOTIS DYNAMIXEL TTL Series (Discontinued DYNAMIXEL may not be supported)
- For 12V DYNAMIXEL power supply, ROBOTIS SMPS 12V 5A PS-10 is recommended
- The included battery connector is compatible with ROBOTIS 3S Li-Po 11.1V batteries LB-010 or LB-020
- Only one JST DYNAMIXEL connector is assembled by default. Please solder included headers when necessary.
- JST DYNAMIXEL connector supports controlling individual servos and daisy-chains.
Parts list:
- DYNAMIXEL MKR Shield (1)
- JST(S3B-EH) (2)
- Molex(5268-02A) (2)
- DC Jack Harness (1)
- Battery Connector(SMW250-02) (1)
- XL-320 Convertible cable (1)
ROBOTIS provides Arduino libraries for DYNAMIXEL Shield to accelerate the development process using Arduino IDE.
Tech specs
| Compatibility | MKR Family |
| VIN(DXL) Voltage¹ | 3.5 ~ 24 [V] |
| Operating Temperature | -10 ~ +80 [°C] |
| Connectors | JST(S3B-EH), Molex(5268-02A) Battery Connector³ (SMW250-02) Terminal Block(DG350-3.5-02P-14) |
| Physical Connection | TTL Multidrop Bus (3.3V Logic, 5V Compatible) |
| Cables | - DC Jack Harness (Type A, O.D.: 5.5 [mm], I.D.: 2.5 [mm]) - Convertible cable for XL-320 |
| Dimensions | 65 x 25 [mm] |
| Weight | 11 [g] |
- ROBOTIS SMPS 12V 5A PS-10 is recommended for 12V DYNAMIXEL power supply.
- Only one JST is assembled by default. Please solder included connectors when necessary.
- The battery connector is compatible with ROBOTIS batteries LB-010 or LB-020.
Documentation
In order to use the AX or MX series TTL cable, solder the included molex connector to an empty DYNAMIXEL Port, or use the Robot Cable-X3P convertible cable.
Please be aware that Arduino MKR boards may limit the 5V power source for USB hardware protection.
More information about the DYNAMIXEL Shield for Arduino MKR Series can be found at the following links below.
Get Inspired

I have prepare home Automoation project using Arduino nano esp32

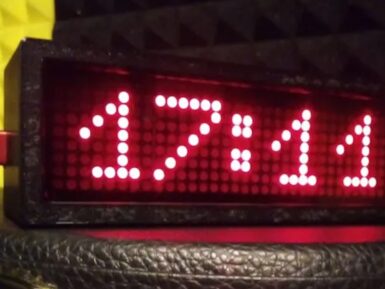
There are almost endless variations of clocks for sale on the internet today, but it is still easy to end up in a situation where you can't quite find a model with the style and features you want. Marco Zonca ended up with that problem while searching for a new clock to put in his music studio. Nothing on the market fit the bill, so he built this minimalist network-updated digital clock. Zonca wanted a simple design, the ability to adjust brightness, and NTP (Network Time Protocol) updates. There are clocks available with those features, but nothing in the style Zonca wanted. So he created the perfect clock for himself. It displays 24-hour time across a red LED matrix, lets the user control settings like brightness via Bluetooth® Low Energy communication, and always stays in sync with network time. An Arduino Nano ESP32 board, programmed through Arduino Web Editor, controls all of those functions. It mounts onto a custom PCB that Zonca designed for this clock. The PCB also hosts an 8×32 LED matrix display with MAX7219 driver. Three buttons on the PCB let the user select modes. The PCB fits into a black 3D-printed enclosure that reflects the overall minimalist style. Now Zonca has the perfect clock for his music studio. If you like the look of it, the sketch, PCB files, and 3D enclosure are all available on Hackster.io.


