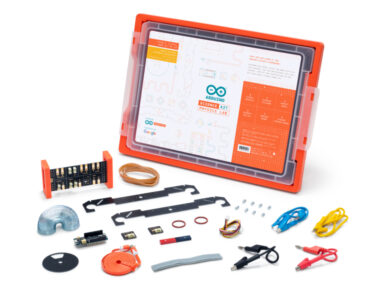
Arduino IoT Bundle
Sold outThe Arduino IoT Bundle is the best way to start exploring the world of connected devices using the Arduino Nano RP2040 Connect. Follow the 5 step by step tutorials to quickly learn how to build IoT devices.
Overview
Follow the 5 step by step tutorials we have prepared for you and combining the electronic components included in the bundle, you’ll quickly learn how to build devices that connect to the Arduino IoT Cloud.
The 5 step by step tutorials are:
Arduino IoT Cloud Compatible
Tech specs
Each bundle includes:
- 1 Arduino Nano RP2040 Connect
- 1 micro USB cable
- 1 400-point breadboard
- 70 solid-core jumper wires
- 2 stranded jumper wire
- 6 phototransistors
- 3 potentiometers (10k ohm)
- 10 pushbuttons
- 1 temperature sensor (TMP36)
- 1 tilt sensor
- 1 alphanumeric LCD (16 x 2 characters)
- 1 bright white
- 28 LEDs (1 RGB, 8 red, 8 green, 8 yellow, 3 blue)
- 1 small DC motor (6/9V)
- 1 small servo motor
- 1 piezo capsule (PKM17EPP-4001-B0)
- 1 H-bridge motor driver (L293D)
- 1 optocouplers (4N35)
- 2 MOSFET transistors (IRF520)
- 5 capacitors (100uF)
- 5 diodes (1N4007)
- 1 male pin strip (40 x 1)
- 20 resistors (220 ohm)
- 5 resistors (560 ohm)
- 5 resistors (1k ohm)
- 5 resistors (4.7k ohm)
- 20 resistors (10k ohm)
- 5 resistors (1M ohm)
- 5 resistors (10M ohm)
Resources for Safety and Products
Manufacturer Information
The production information includes the address and related details of the product manufacturer.
Arduino S.r.l.
Via Andrea Appiani, 25
Monza, MB, IT, 20900
https://www.arduino.cc/
Responsible Person in the EU
An EU-based economic operator who ensures the product's compliance with the required regulations.
Arduino S.r.l.
Via Andrea Appiani, 25
Monza, MB, IT, 20900
Phone: +39 0113157477
Email: support@arduino.cc
Get Inspired

… usar, los alumnos simplemente tienen que conectar el dispositivo Android a la placa, montar el proyecto, y después usa los sensores que contiene la shield y los módulos plug-and-play para simular las atracciones. Los datos son transmitidos del experimento a el dispositivo móvil del alumno via Bluetooth, donde se puede ver y analizar el resultado obtenido en la app Science Journal de Google o en las fichas de los alumnos. Arduino Education Science Kit Physics Lab no está pensado para usarse únicamente en clase. De hecho, los alumnos pueden usar el kit en exteriores para convertir su recreo en su propia feria de ciencia aplicando los conceptos que han aprendido, y así, diseñar y probar sus propias atracciones. Basado en el uso de Arduino MKR WiFi 1010 , que es un laboratorio portátil incluyendo un grupo de sensores para medir luminosidad, temperatura, movimiento, campos magnéticos y mucho más… todo esto en una caja Gratnells protectora. Arduino Education apunta a apoyar a los profesores proporcionando nuestros programas, contenido online y las hojas del alumno en el mayor número de idiomas posible: no solo en los idiomas Europeos relevantes, por ejemplo, Árabe y Japonés están planeados para futuras actualizaciones. Lo siguientes idiomas para Science Kit Physics Lab serán Alemán, Húngaro y Portugués. MÁS INFORMACIÓN Da oggi Science Kit è disponibile anche in italiano e spagnolo. Nel Gennaio 2019, in collaborazione con Google, Arduino Science Kit Physics Lab è stato lanciato sul mercato, per studenti di scuola media (tra 11 e 14 anni) e non solo, con l'obiettivo di esplorare la scienza, divertendosi. Da oggi, i contenuti del corso sono disponibili in italiano e spagnolo, rendendolo ancora più accessibile. “Sei tu che esperimenti in prima persona, ed è stato davvero divertente poterlo fare” ha commentato uno studente inglese dell'accademia di ARK Burlington Danes. Arduino Science Kit Physics Lab
FAQs
I plugged the board to my PC / MAC but I cannot see the serial port listed in the IDE, so I can't upload my sketch to the board!
- Make sure the foam that protects the boards’ pins is removed.
- Try connecting the board with another USB cable.
- Try connecting the board to another USB port. If possible, avoid USB-hubs.
You can see more information and other things to try in this Help Center article.
Do I need to subscribe to the Arduino IoT Cloud to build the projects described in the tutorials?
No, all the projects can be built using the free plan of the Arduino IoT Cloud. Click here to see what is included in the plan.
How to enable the 5V / VUSB pin?
The 5V pin is disabled by default. You can locate on the bottom of the board on the VBUS pin two pads, shorting these will enable 5V output. More info on this here.
Where can I find the step by step tutorials?
You can find the step by step tutorials at arduino.cc/iot-bundle


