Skip to content

    Your cart is empty

    Time to spark some excitement 🛒⚡

Taxes and shipping calculated at checkout
Subtotal €0,00

Arduino MKR GPS Shield

SKU ASX00017 Barcode 7630049201248 Show more
Original price €0
Original price €42,90 - Original price €42,90
Original price
Current price €42,90
€42,90 - €42,90
Current price €42,90
VAT included

The low power Global Navigation Satellite System receiver shield for your georeferenced projects.

Overview

If you are experimenting with monitoring fleets, high-altitude scientific experiments, or any kind of project requiring localization of devices, the MKR GPS Shield will offer you the functionality you need, and it is plug 'n' play!

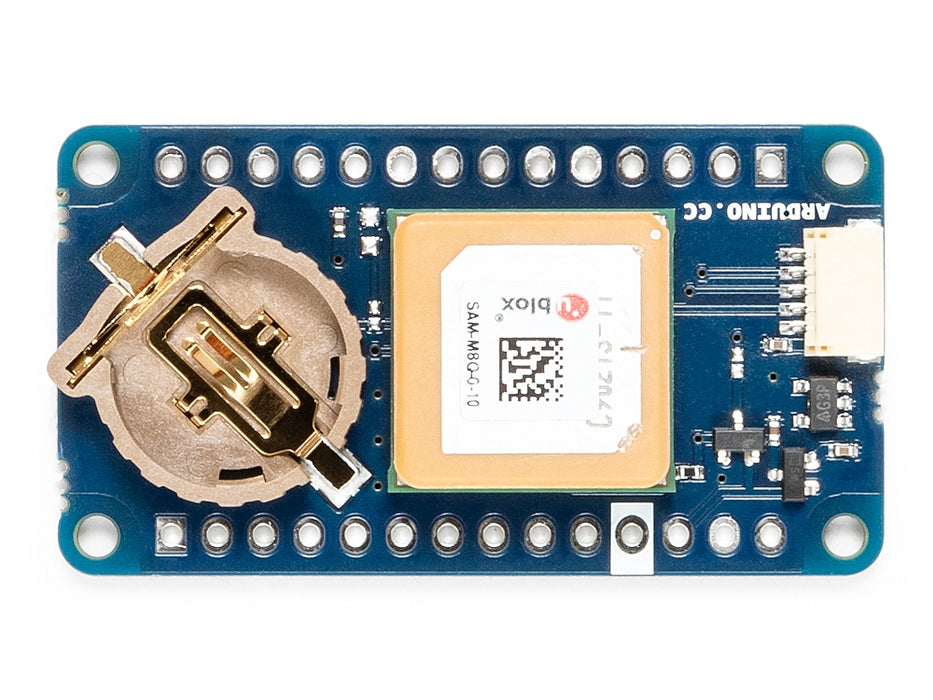
The MKR GPS Shield is based on the u-blox SAM-M8Q GNSS (Global Navigation Satellite System) module. It is meant to be used on top of boards in the MKR format, but thanks to its Eslov connector, it is also possible to hook it up to any board having that kind of connector available using a cable.

This module is designed to operate with different positioning services concurrently. It receives and processes the signals from GPS, GLONASS, and Galileo. It interfaces with Arduino boards either through a serial interface, when used with headers and put on top of a MKR board, or through an I2C interface and a dedicated ESLOV cable supplied as bundle.

Configuration Commands and Backup

The GPS module can be configured via special commands. We have included an on-board battery holder for the system to keep the configurations made via software. This can be convenient when e.g. changing the operation mode of the GPS to 1g, something common in high altitude experiments, where specific settings away from the default ones are needed for the device.

Another example is the use of Galileo's localization option, which is disabled by default, but can be enabled by sending a configuration message (UBXCFG-GNSS) to the receiver. You can find a detailed description of all of the commands in the protocol here.

Getting Started

Our Arduino_MKRGPS library handles the two different interfaces and offer a consistent set of APIs designed for a full usage of the GPS acquired information

Need Help?

Check the Arduino Forum for questions about the Arduino Language, or how to make your own Projects with Arduino. Need any help with your board please get in touch with the official Arduino User Support as explained in our Contact Us page.

Warranty

You can find here your board warranty information.


Tech specs

GNSS receiver u-blox module SAM-M8Q (datasheet)
Connectors MKR headers / Eslov
Input Voltage 3.3V
Operating Voltage 3.3V
Backup battery CR1216
Communication Serial / I2C / DCC
Length 45 mm
Width 25 mm
Weight 14 gr.

Conformities

The following Declarations of Conformities have been granted for this board:
REACH
For any further information about our certifications please visit docs.arduino.cc/certifications

Resources for Safety and Products

Manufacturer Information

The production information includes the address and related details of the product manufacturer.

Arduino S.r.l.
Via Andrea Appiani, 25
Monza, MB, IT, 20900
https://www.arduino.cc/ 

Responsible Person in the EU

An EU-based economic operator who ensures the product's compliance with the required regulations.

Arduino S.r.l.
Via Andrea Appiani, 25
Monza, MB, IT, 20900
Phone: +39 0113157477
Email: support@arduino.cc


Documentation

OSH: Schematics

The Arduino MKR GPS Shield is open-source hardware! You can build your own board using the following files:

EAGLE FILES IN .ZIP SCHEMATICS IN .PDF

Additional I2C Port

The MKR GPS Shield has an additional connector meant as an extension of the I2C bus. It's a small form factor 5-pin connector with 1.0 mm pitch. The mechanical details of the connector can be found in the connector's datasheet.

The I2C port, also referred to as the Eslov self-identification port within Arduino, comes with: SDA, SCL, GND, +5V, and an extra digital pin meant to send an alarm to the otherwise plain I2C devices connected to it. The pinout is shown in the following image:

If you are interested in designing your own modules for Arduino boards with this expansion port, the connector we suggest using is code: SHR-05V-S-B, also in the picture.

Get Inspired

PROJECT HUB
Arduino Bluetooth Tank
Project Tutorial by mastoras_inc

I'm excited to share the details of my BT Arduino Tank project, which incorporates some impressive 3D-printed components. While the main chassis of the tank was not 3D-printed, I utilized this technology to create two crucial parts: the enclosure for the motor driver and the compartment housing the remaining electronics. Additionally, I 3D-printed a cannon for an added touch of customization. The enclosure for the motor driver served as a protective housing, ensuring that the L298N motor driver module was securely mounted and shielded from external elements. By designing and 3D-printing this part, I could precisely fit it to the tank's specifications, providing a neat and organized arrangement of the electronics. In the same vein, the compartment for the remaining electronics, such as the Arduino Nano Every and the HC-05 Bluetooth module, was also 3D-printed. This enclosure offered a clean and organized solution for housing these components, safeguarding them while maintaining easy access for maintenance or modifications. Lastly, to enhance the tank's appearance and add a touch of personalization, I designed and 3D-printed a cannon. This custom-printed cannon perfectly complemented the overall design, making the tank even more visually appealing. By strategically incorporating 3D printing into specific parts of the project, I achieved a balance between functionality and customization. The precision and versatility of 3D printing allowed me to create tailored enclosures and a unique cannon, elevating the overall aesthetic and practicality of my BT Arduino Tank project.

read more
BLOG
Arduino Nano Every brings Knight Rider sound effects to Knight Rider RC car
February 14, 2023

KITT (Knight Industries Two Thousand) was a fictional car based on a 1982 Pontiac Trans Am in the Knight Rider television series. KITT featured an artificial intelligence, voiced by the legendary William Daniels, and some iconic styling. Savall21 built a replica RC KITT and used Arduino boards to add sound and light effects that he can trigger with the RC transmitter. This is a custom RC car created by Savall21 using a Tamiya TT-02 kit and a resin 3D-printed body shell. The controller/transmitter is a Jumper T18, which has a customizable touchscreen interface. Savall21 programmed his own widget for that touchscreen. It mimics the fictional KITT control panel and lets the user select different sound effects and activate the iconic headlights. The T18 sends commands to an FrSky XR8 radio receiver located in the car. The FrSky receiver communicates with two Arduino Nano Every boards via the S.Port. The first Arduino controls the sound effects, which play through a DFPlayer Mini MP3 player module. The FrSky receiver simply sends a numerical code to the Arduino, which then activates the corresponding audio clip. The second Arduino drives a strip of WS2812B individually addressable RGB LEDs for the headlights and taillights. The user can control the headlights directly, while the taillights automatically come on any time the throttle is below 50%. For fans of Knight Rider and RC vehicles, this is the ultimate project. The car looks fantastic and the Arduino effects add polish to the build.

read more

Compare products

0 of 3 items selected

Select first item to compare

Select second item to compare

Select third item to compare

Compare