


Overview
It can be positioned anywhere and is suitable for precision farming, smart agriculture, and other applications requiring intelligent control in remote locations. Power can be either supplied via solar panel or DC input.
Remotely control your application through the Arduino Cloud (or third-party services) using a choice of connectivity options suitable to the location. The Arduino Edge Control features built-in Bluetooth® and its connectivity can be expanded with 2G/3G/CatM1/NB-IoT modems, LoRa®, Sigfox, and WiFi by adding anyone of the MKR boards.
The Arduino Edge Control is capable of connecting sensors and drive actuators like latching valves (common in agriculture). Moreover, it has the capability to provide real-time monitoring over the entire process, thereby reducing production-related risks.
Particularly suited to smart agriculture, the sensors can collect real-time data such as weather conditions, soil quality, crop growth, amongst others. Once sent to the Arduino Cloud, the data value chain becomes valuable analytics that supports business processes at various levels (e.g. crop yield, equipment efficiency, staff performance, etc.). The Arduino Edge Control has the capability to improve crop quality and reduce human effort/error by automating processes like irrigation, fertilization, or pest control.
Application Examples
- Automated Greenhouses

Automatically manage the humidity and temperature to ensure the best environment for crop growth, minimising carbon emissions and increasing economic yield. The inclusion of an Arduino MKR GPS Shield allows for optimum crop rotation planning and acquisition of geospatial data.
- Hydroponics/Aquaponics

Since hydroponics involves the growth of plants without soil, delicate care must be taken to maintain the conditions required for optimum growth. The Arduino Edge Control can be set-up to control these conditions with minimal manual labour.
The Arduino Edge Control can help match the even higher requirements of Aquaponics, by providing automated control over the internal process and reducing production risks.
- Mushroom Cultivation
Mushrooms are notorious for requiring the perfect temperature and humidity conditions to sustain spore growth, while also preventing competing fungi from growing. Thanks to the numerous watermark sensors, output ports and connectivity options available on the Arduino Edge Control, this precision farming can be achieved on an unprecedented level.
Tech specs
| Microcontroller | nRF52840 (64 MHz Arm® Cortex-M4F) |
| Digital Input | 6x edge sensitive wake up pins |
| Digital Output | 8x latching relay command outputs with drivers 8x latching relay command outputs without drivers |
| Relays | 4x 60V/2.5A galvanically isolated solid state relays |
| Analog Input | 4x 4-20mA inputs 8x 0-5V analog inputs 16x hydrostatic watermark sensor input |
| Terminal Block Connectors | 6x 18 pin plug in terminal block connectors |
| Power Supply | 12 V Acid/lead SLA Battery Supply (Recharged via solar panels) |
| Power Consumption | Low power (up to 34 months on a 12V/5Ah battery) 200uA Sleep current |
| Memory | 1 MB onboard Flash memory 2 MB onboard QSPI Flash memory |
| SD Card | Interface for SD Card connector (through expansion port only) |
| Connectivity |
Bluetooth |
| Peripherals | Full-speed 12 Mbps USB Arm CryptoCell CC310 security subsystem QSPI/SPI/TWI/I²S/PDM/QDEC High speed 32 MHz SPI Quad SPI interface 32 MHz 12-bit 200 ksps ADC 128 bit AES/ECB/CCM/AAR co-processor |
| Operational Temperature | -40° C to +85° C (-40° F to 185°F) |
| Length | 104 mm |
| Width | 86 mm |
Conformities
Resources for Safety and Products
Manufacturer Information
The production information includes the address and related details of the product manufacturer.
Arduino S.r.l.
Via Andrea Appiani, 25
Monza, MB, IT, 20900
https://www.arduino.cc/
Responsible Person in the EU
An EU-based economic operator who ensures the product's compliance with the required regulations.
Arduino S.r.l.
Via Andrea Appiani, 25
Monza, MB, IT, 20900
Phone: +39 0113157477
Email: support@arduino.cc
Documentation
Study how the Arduino Edge Controls works using following files:
SCHEMATICS IN .PDF DATASHEET IN .PDF
Pinout Diagram
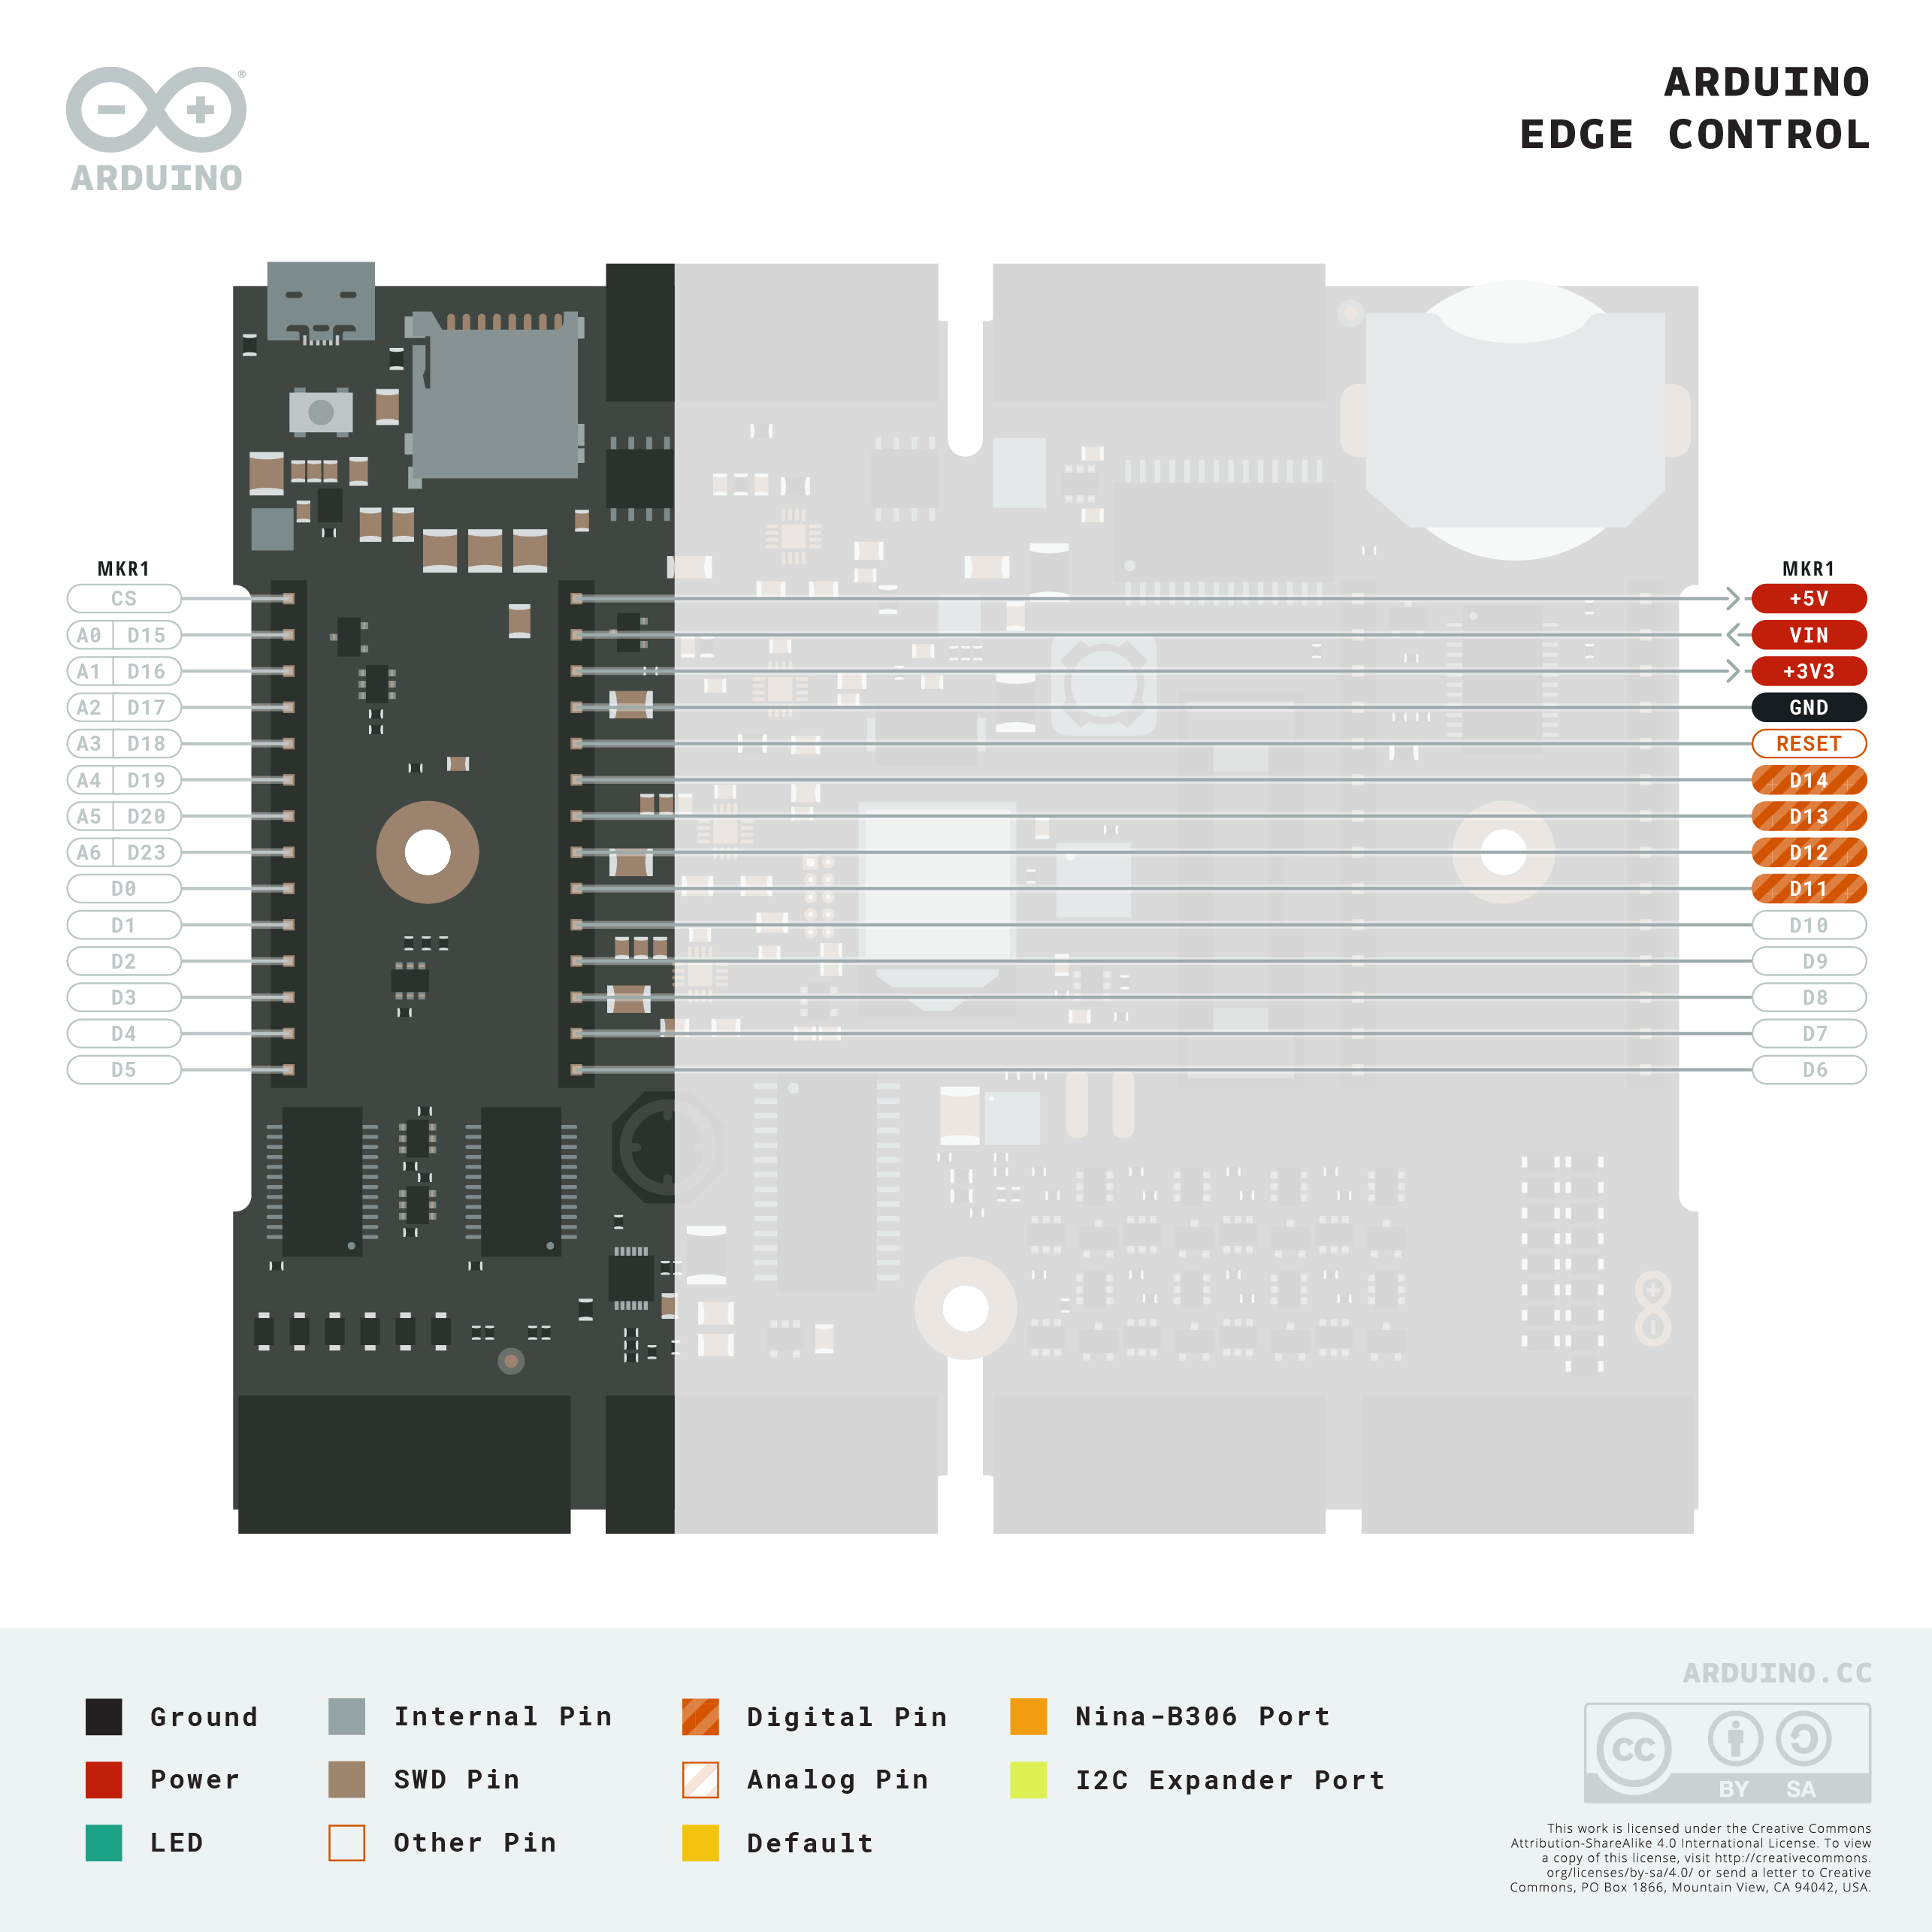
Download the full pinout diagram as PDF here.